#**Lab 26: Build a Java JEE CI-CD Stack from scratch and get to work containerizing your Monolith!**
In this lab we will will learn how to create all of the tooling used to support a Java JEE Stack on OpenShift including:
* Gogs - self hosted git server
* Nexus3 - the content repository for caching all of our built artifacts, dependencies and (new in version 3) docker images !
* SonarQube - used for code quality analysis in our build pipeline
* Jenkins - used to create the CI/CD pipeline
We are going to deploy the JBoss Ticket Monster example - a show case online ticketing demo application that gets you started with JBoss technologies, and helps you learn and evaluate them.
We will start with the monolithic deployment of Ticket Monster and then learn how to deploy it in a microservices type architecture.
**Prerequisites**
* A working OpenShift 3.2+ environment you have `cluster-admin` and `developer` based access to (we will be setting up storage for some of our containers)
* Lots of coffee
* Some Java knoweldge ! though not essential
* git locally installed on your developer laptop/workstation
**Remember** if you are in a shared OpenShift environment you will need to create Projects/Namespaces that contain a user identifier in the project names as required.
**(Information Only)** For this lab I am using the following environment:
* client is a linux laptop running fedora.24
* a libvirt based VM on fedora.24
* the VM is running - CentOS Linux release 7.2.1511 (fully yum updated)
* Docker 1.10.3
* OpenShift Origin installed via:
wget https://github.com/openshift/origin/releases/download/v1.3.0-alpha.2/openshift-origin-client-tools-v1.3.0-alpha.2-983578e-linux-64bit.tar.gz
tar xzvf openshift-origin-client-tools-v1.3.0-alpha.2-983578e-linux-64bit.tar.gz
ln -s /root/openshift-origin-client-tools-v1.3.0-alpha.2-983578e-linux-64bit/oc /usr/local/bin/oc
chmod 755 /root/openshift-origin-client-tools-v1.3.0-alpha.2-983578e-linux-64bit/oc
oc cluster up --use-existing-config --host-data-dir=/var/tmp/etcd
**Step 1: Setup persistent storage for your containers**
We need a few volume mounts for our different workloads so their data can survive across container restarts.
Since my lab setup is a single instance for developer usage, i'm going to use Persistent Volumes based on `hostMount` straight onto the underlying VM.
You can (and should) replace this with NFS, Gluster, ISCI, EBS, or whatever your shared storage provider is for your environment as per the OpenShift documentation [here](https://docs.openshift.com/enterprise/3.2/install_config/persistent_storage/index.html)
Create the physical directories (and also ensure permissions and SELinux labels correctly set for your environment)
for x in {1..6}; do
mkdir -p /mnt/pv$x
chmod 777 -R /mnt/pv$x
chcon -u system_u -r object_r -t svirt_sandbox_file_t /mnt/pv$x
done
Login as system admin (or a cluster-admin user)
oc login -u system:admin
Create Persistent Volumes
for x in {1..6}; do
oc create -f - <<EOF
{
"apiVersion": "v1",
"kind": "PersistentVolume",
"metadata": {
"name": "pv$x"
},
"spec": {
"capacity": {
"storage": "1Gi"
},
"accessModes": [ "ReadWriteOnce" ],
"hostPath": {
"path": "/mnt/pv$x"
}
}
}
EOF
done
Create a PVC for the registry:
oc project default
oc create -f - <<EOF
{
"apiVersion": "v1",
"kind": "PersistentVolumeClaim",
"metadata": {
"name": "registry-claim"
},
"spec": {
"accessModes": [ "ReadWriteOnce" ],
"resources": {
"requests": {
"storage": "1Gi"
}
}
}
}
EOF
Mount this PVC into our registry container(s)
oc volume dc/docker-registry \
--add --overwrite --name=registry-storage --mount-path=/registry \
--type=persistentVolumeClaim --claim-name=registry-claim
**Step 2: (Optional) Setup a pipeline capable openshift client**
To demo the pipeline features upcoming in OpenShift 3.3 you can also install a client that has the correct API.
wget https://github.com/openshift/origin/releases/download/v1.3.0-alpha.2/openshift-origin-client-tools-v1.3.0-alpha.2-983578e-linux-64bit.tar.gz
tar xzvf openshift-origin-client-tools-v1.3.0-alpha.2-983578e-linux-64bit.tar.gz
mv openshift-origin-client-tools-v1.3.0-alpha.2-983578e-linux-64bit/oc /usr/bin/oc
sudo mv openshift-origin-client-tools-v1.3.0-alpha.2-983578e-linux-64bit/oc /usr/bin/oc
sudo chmod 755 /usr/bin/oc
**Step 3: Create Infrastructure Type Projects**
Lets create our infrastructure type projects up front. We will deal with the actual Java application separately.
oc login -u developer --server=https://192.168.137.2:8443 --insecure-skip-tls-verify=true -p developer
oc new-project jenkins --display-name="Jenkins" --description="Jenkins"
oc new-project nexus --display-name="Nexus" --description="Nexus"
oc new-project gogs --display-name="Gogs" --description="Gogs"
oc new-project sonarqube --display-name="SonarQube" --description="SonarQube"
**(Optional)** If you are using host mounted storage like i am, we need to allow access. As a cluster admin user:
oc login -u system:admin
oc adm policy add-scc-to-user hostaccess -z jenkins -n jenkins
oc adm policy add-scc-to-user hostaccess -z default -n nexus
oc adm policy add-scc-to-user hostaccess -z gogs -n gogs
oc adm policy add-scc-to-user hostaccess -z sonarqube -n sonarqube
If you login to the web console for OpenShift as you `developer` user, it should now look something like this:

**Step 4: Deploy Jenkins**
Deploy a Jenkins pod from the supplied template. This will create a `PersistentVolumeClaim` to store master jenkins and job configuration and build history.
oc project jenkins
oc new-app -f https://raw.githubusercontent.com/eformat/openshift-jenkins/master/jenkinstemplate.json
Once the Jenkins image is pulled, you should see a running instance available at this endpoint.

You can login to Jenkins using the default admin credentials:
https://jenkins-jenkins.192.168.137.2.xip.io/
User: admin
Password: password

**Step 5: Deploy Nexus3**
Deploy a Nexus3 pod from the supplied template. This will create a `PersistentVolumeClaim` to store cached images and assets in.
oc project nexus
oc new-app -f https://raw.githubusercontent.com/eformat/openshift-nexus/master/nexus.yaml
Once the Nexus image is pulled, you should see a running instance available at this endpoint.

You can login to Nexus using the default admin credentials:
http://nexus-nexus.192.168.137.2.xip.io/
User: admin
Password: admin123

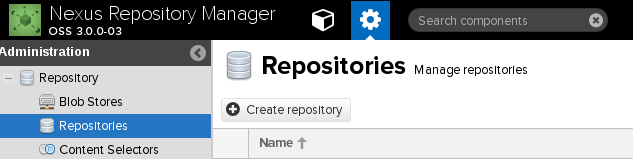
Add in the JBoss Repositories that we will use for our builds later on in the lab.
Browse to `Server Admin` -> `Repositories` -> `Create repository` -> `maven2 (proxy)`
Create two new repos with the follows details filled in.
Repo No#1
Name: jboss
Remote storage: http://maven.repository.redhat.com/techpreview/all/
Blob storage: default
Hit `Create repository` button
Repo No#2
Name: jboss-ce
Remote storage: https://repository.jboss.org/nexus/content/groups/public/
Blob storage: default
Hit `Create repository` button
You should now see these in the top level repository view:

**Step 6: Deploy Gogs**
Deploy a self hosted Gogs git repo manager pod from the supplied template. This will create a `PersistentVolumeClaim` to store your source code and configuration in.
oc project gogs
oc new-app -f https://raw.githubusercontent.com/eformat/gogs-openshift-docker/master/gogs-persistent.yaml
Once the Gogs image is pulled, you should see a running gogs instance and postgres database instance available at this endpoint.
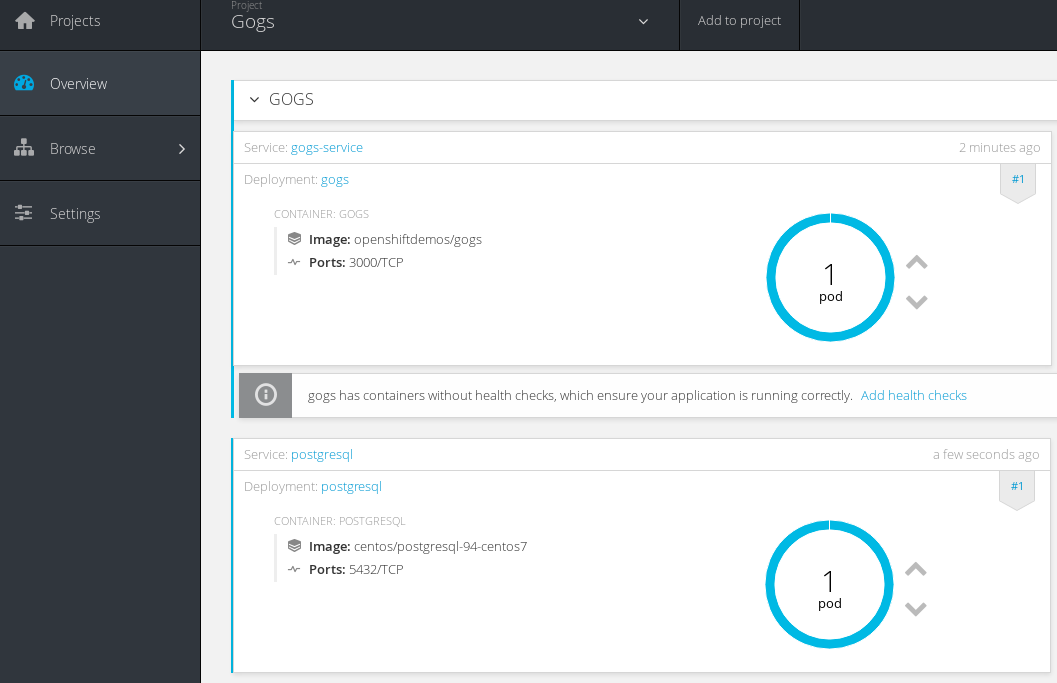
We need to setup the postgres database instance the first time we login to the Gogs admin console.
Run the following command to obtain the user, password, address and port from the running postgresql pod:
oc exec $(oc get pods | grep postgres | awk '{print $1}') env | grep POSTGRES
POSTGRESQL_USER=gogs
POSTGRESQL_PASSWORD=WVWrhc7y
POSTGRESQL_SERVICE_PORT_POSTGRESQL=5432
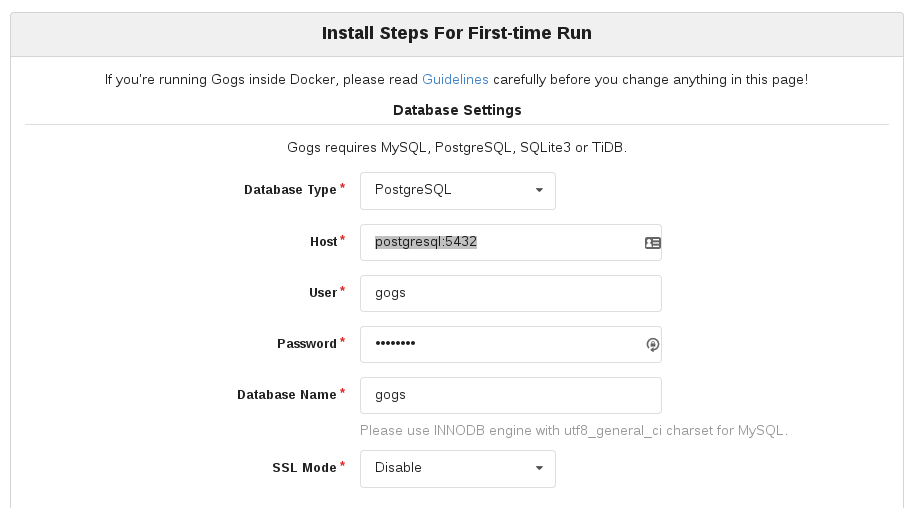
You can now browse to Gogs and perform the `First-time Run` steps:
http://gogs-gogs.192.168.137.2.xip.io/install
Fill in the following details - Note: Your password will differ:
Database Type: PostgreSQL
Host: postgresql:5432
User: gogs
Password: WVWrhc7y
Database Name: gogs
SSL Mode: disable
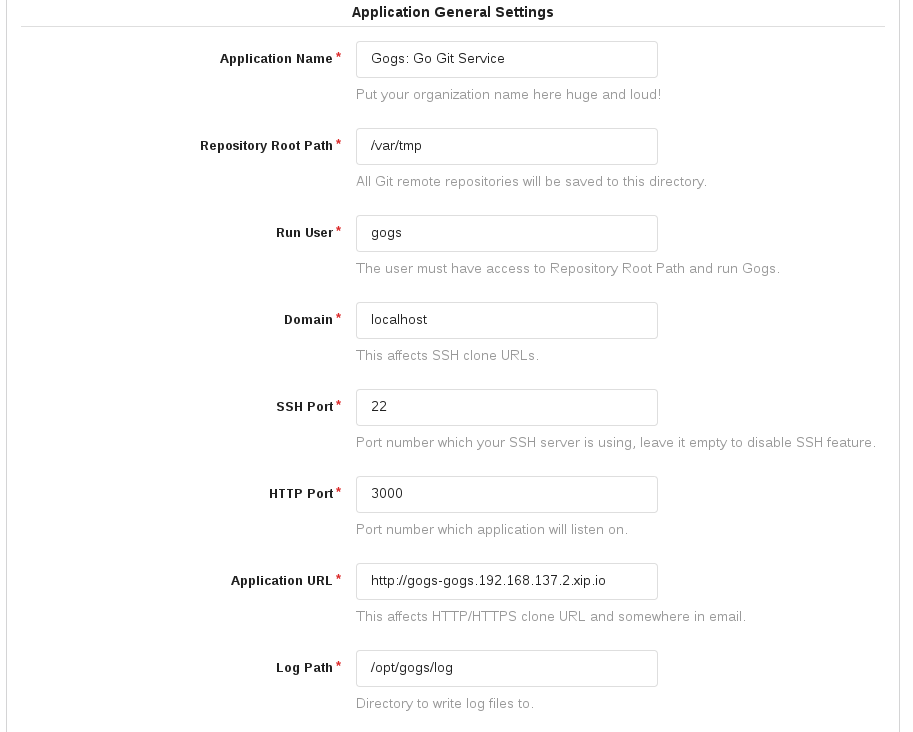
In the `Application General Settings` set - Note: you ip may differ:
Application URL: http://gogs-gogs.192.168.137.2.xip.io
Repository Root Path: /var/tmp
In the `Optional Settings` setup an admin user - use your first name e.g.
Username: mike
Password: password
Admin Email: mike@mike.com
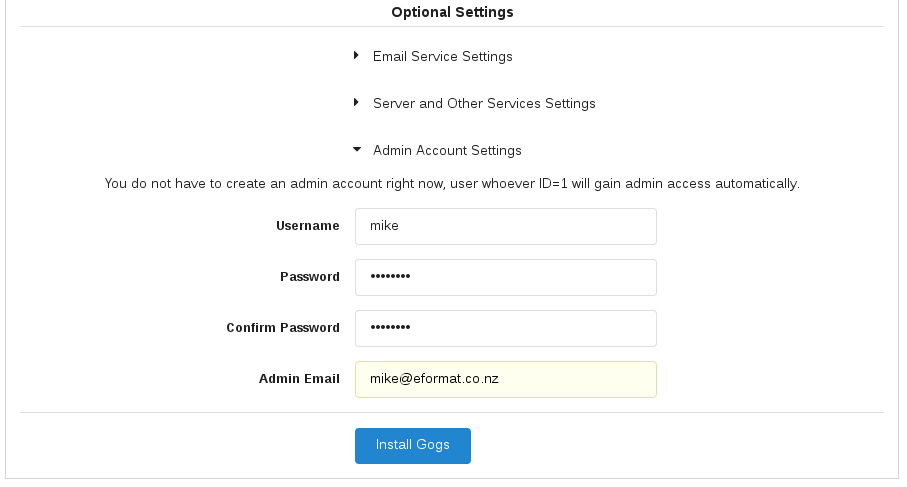
Select `Install Gogs` button. This should now log you in to the application:
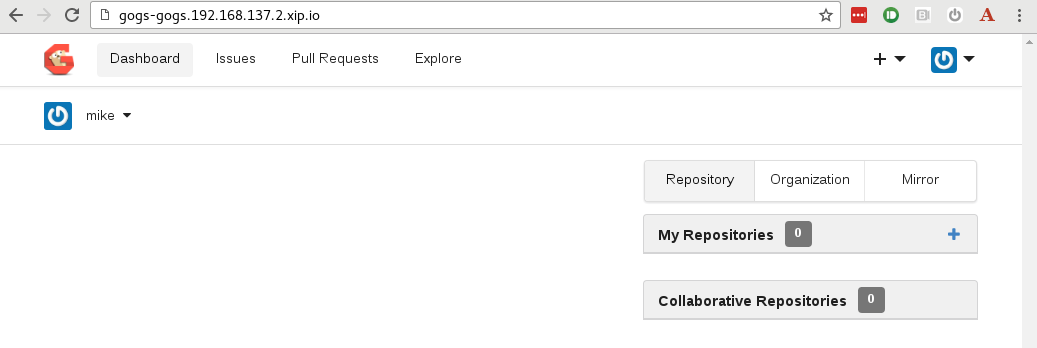
Gogs unfortunately stores information we just entered for the first run into its `app.ini` file. We can save this away into an Openshift `ConfigMap` so the information survives pod restarts as follows:
oc project gogs
oc create configmap gogs --from-file=appini=<(oc exec $(oc get pods | grep gogs | awk '{print $1}') -- cat /etc/gogs/conf/app.ini)
oc volume dc/gogs --add --overwrite --name=config-volume -m /etc/gogs/conf/ \
--source='{"configMap":{"name":"gogs","items":[{"key":"appini","path":"app.ini"}]}}'
**Step 7: Deploy Sonarqube**
Deploy a Sonarqube pod from the supplied template. This will create a `PersistentVolumeClaim` to store cached data and code scan results in.
oc new-project sonarqube --display-name="SonarQube" --description="SonarQube"
oc new-app -f https://raw.githubusercontent.com/eformat/openshift-sonarqube/master/sonarqube.yaml
Once the Sonarqube image is pulled, you should see a running instance available at this endpoint.
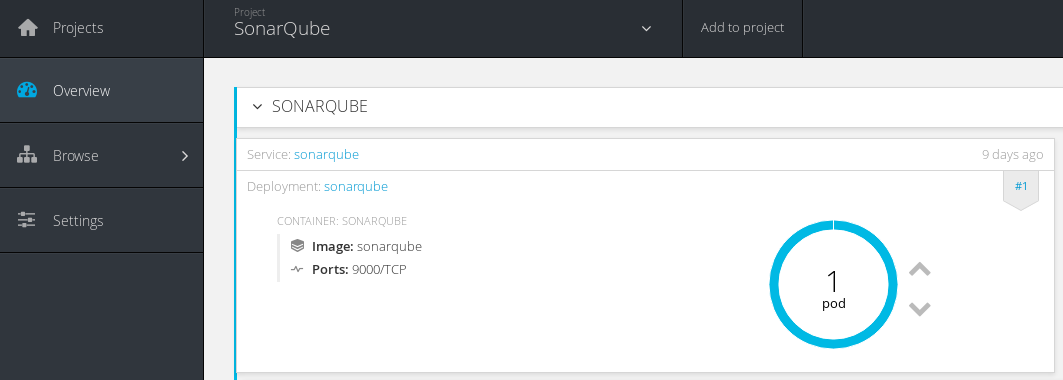
You can login to Sonarqube using the default admin credentials:
http://sonarqube-sonarqube.192.168.137.2.xip.io/
User: admin
Password: admin

**Step 6: Build Ticket Monster Application (Monolith) from source code**
The [Ticket Monster](http://developers.redhat.com/ticket-monster/) application is a moderately complex application that demonstrates how to build modern applications using JBoss web technologies.
For this step, we are going to be building the monolithic version (the UI, Application Tier, Database Tier) are all built together as part of a single deployment artifact (a Java WAR file) and deployed onto JBoss EAP (JEE Application server) in Openshift.
**(Optional)** Lets make sure we have the JBoss templates loaded into our shared `openshift` namespace. These are normally loaded when you install/update Openshift, so you can check they already exist prior to loading them:
oc login -u system:admin
oc create -f https://raw.githubusercontent.com/jboss-openshift/application-templates/master/eap/eap70-basic-s2i.json -n openshift
oc create -f https://raw.githubusercontent.com/jboss-openshift/application-templates/master/jboss-image-streams.json -n openshift
Lets checkout the source code onto our local machines - create a directory and got clone as follows:
cd ~/monster/monolith
git clone https://github.com/jboss-developer/ticket-monster.git -b 2.7.0.Final .
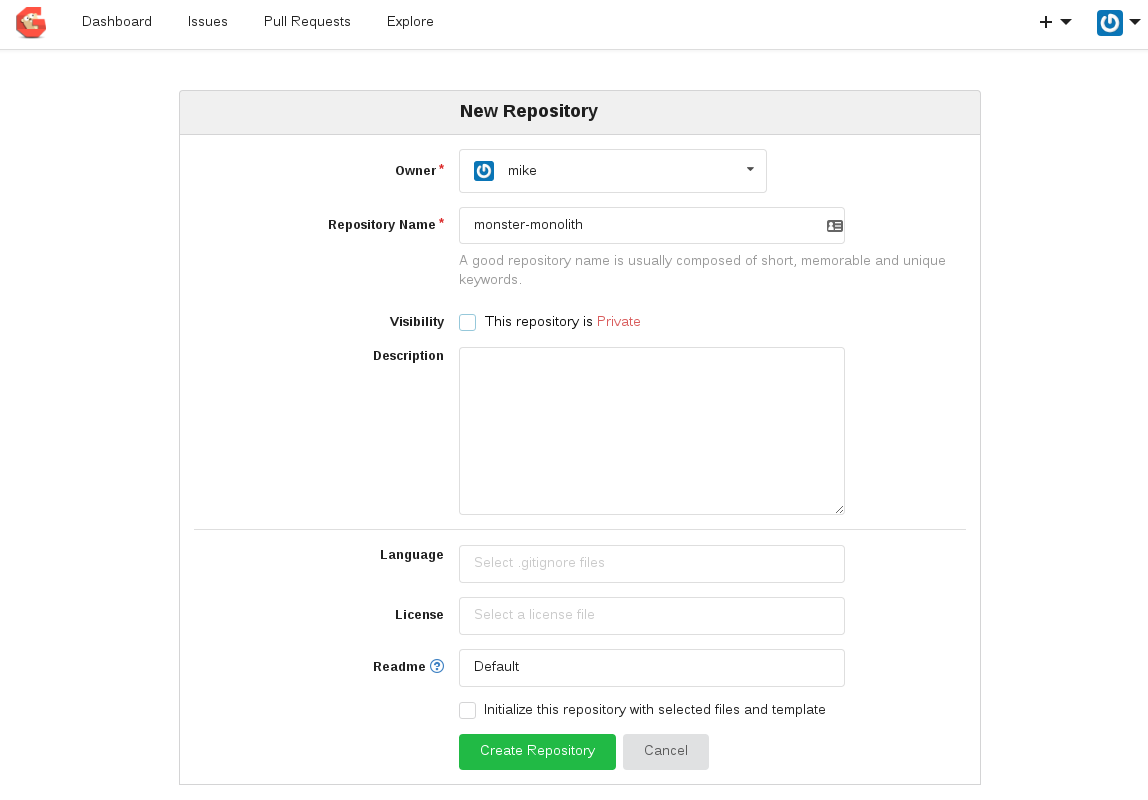
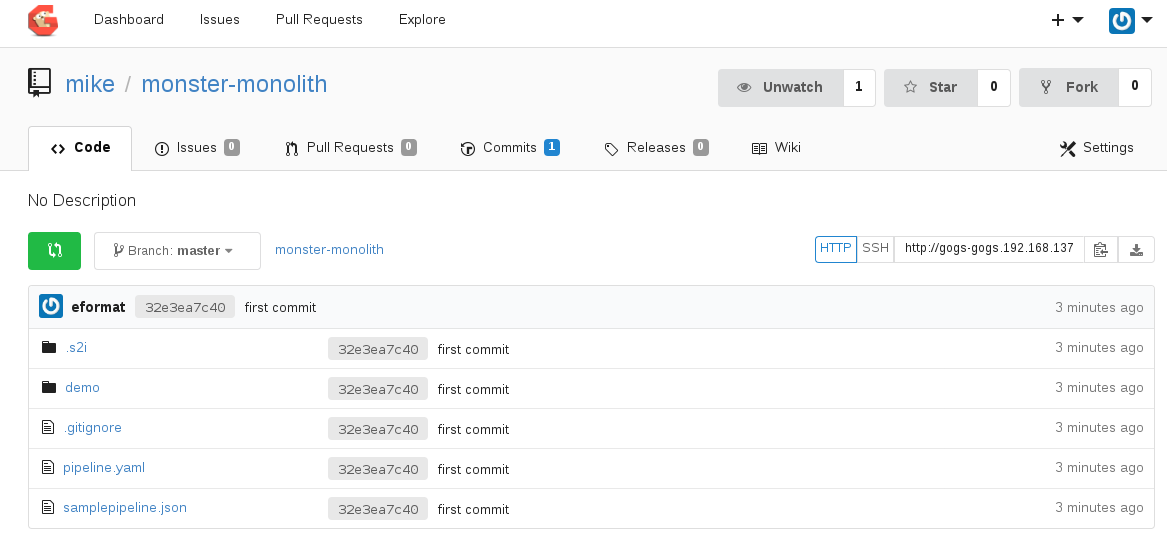
Login to Gogs and create a repository called `monster-monolith`. Select `Create Repository`
Now in your source code, remove the upstream git information and unnecessary folders and check in the code to our Openshift hosted Gogs repo:
rm -rf cordova/ README.* .git/
git init
git add .
git commit -m "first commit"
git remote add origin http://gogs-gogs.192.168.137.2.xip.io/mike/monster-monolith.git
git push -u origin master
Now lets create a project and build the application using S2I (source to image) using our Gogs hosted repo:
oc login -u developer --server=https://192.168.137.2:8443 --insecure-skip-tls-verify=true -p developer
oc new-project monster-monolith --display-name="Ticket Monster Monolith" --description="Ticket Monster Monolith"
oc new-app --template=eap70-basic-s2i -p=APPLICATION_NAME=ticket-monster,CONTEXT_DIR=demo,SOURCE_REPOSITORY_URL=http://gogs-gogs.192.168.137.2.xip.io/mike/monster-monolith.git,SOURCE_REPOSITORY_REF=''
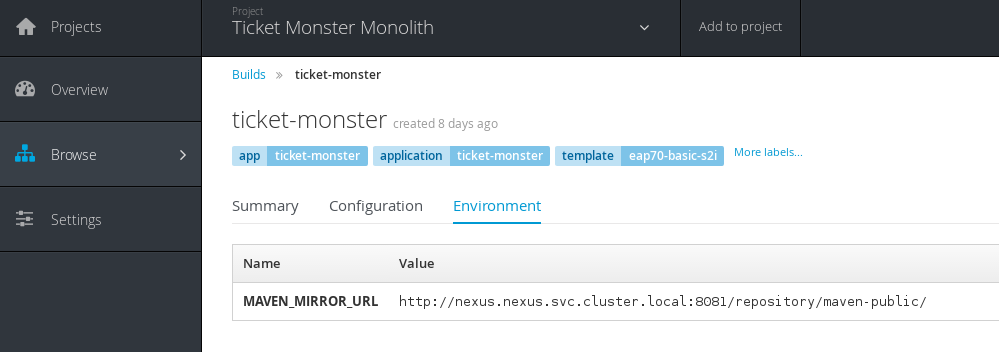
When the build starts, we want to stop it straight away so we also pull our dependencies using our Nexus Repo. This can be done by adding an `environment variable` to our build configuration called `MAVEN_MIRROR_URL`:
oc cancel-build ticket-monster-1
oc set env bc/ticket-monster MAVEN_MIRROR_URL=http://nexus.nexus.svc.cluster.local:8081/repository/maven-public/
You can see the environment in the GUI under `Builds` -> `Environment`
Now restart the build:
oc start-build ticket-monster
You should now see in the logs for the build, that maven artifacts are being pulled from our nexus repo manager:
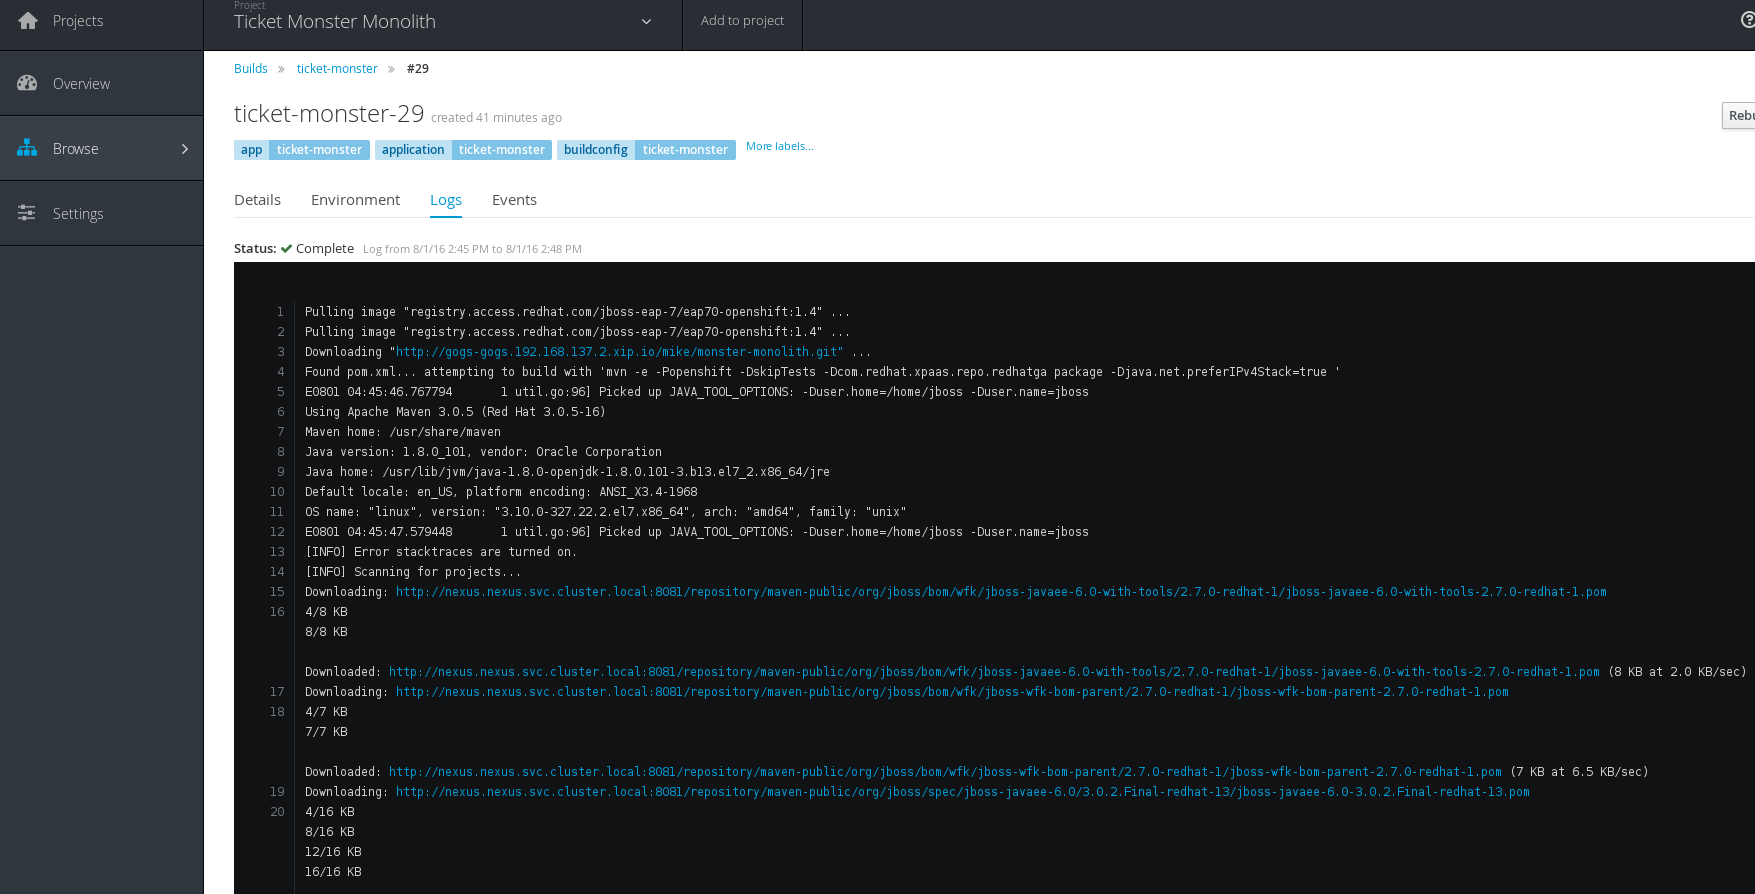
Once the build completes Successfully, you can browse to the Ticket Monster Application and try it out!
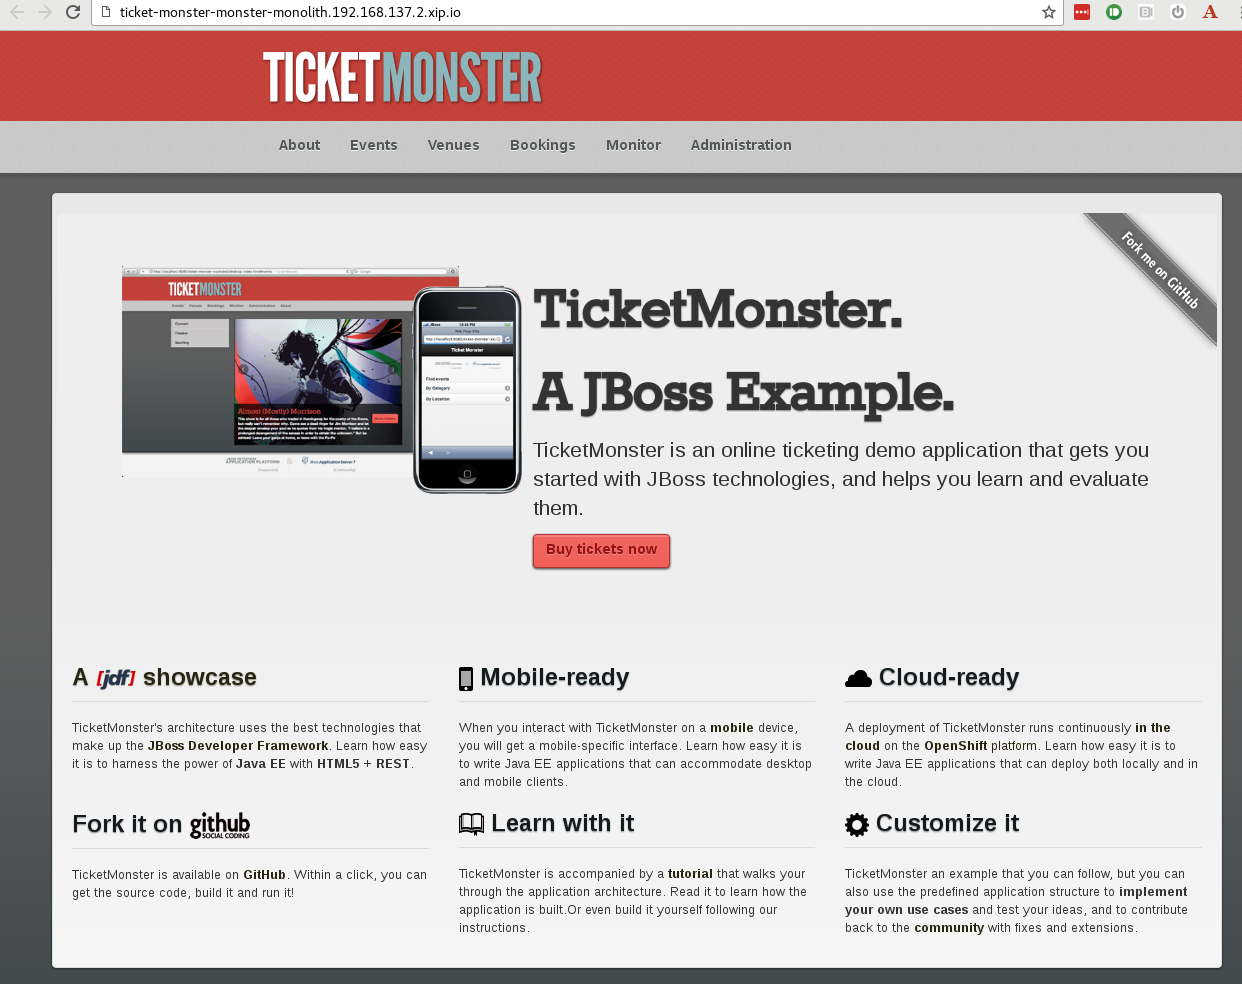
**Step 7: Build using a simple pipeline**
Lets use Jenkins to create a simple pipeline build. This uses the Jenkins pipeline/workflow plugin which you can read more about [here](https://github.com/jenkinsci/workflow-plugin/blob/master/TUTORIAL.md)
First we need to add the Jenkins service account to our project so it can execute builds:
oc adm policy add-role-to-user edit system:serviceaccount:jenkins:jenkins -n monster-monolith
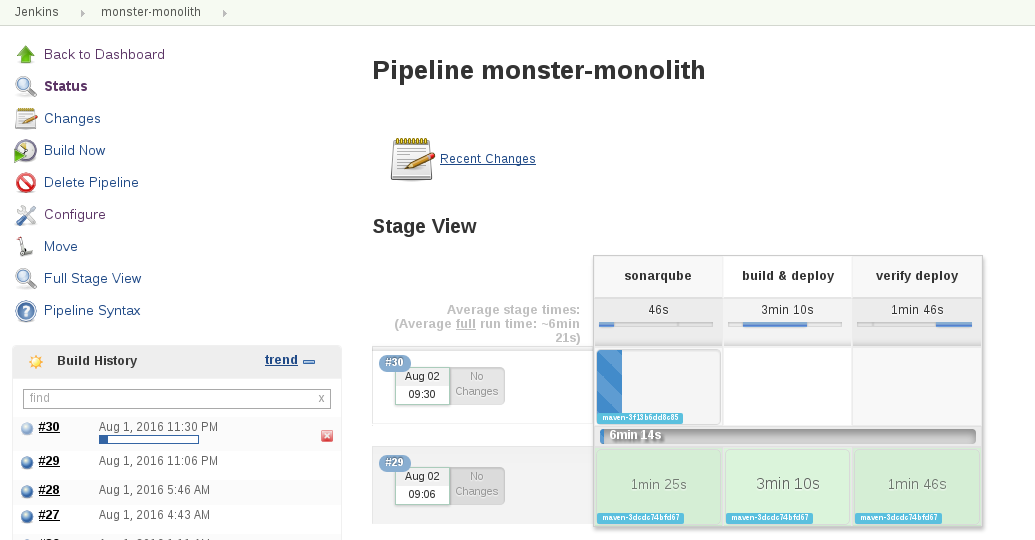
Now, Login to Jenkins UI and create a `New Item` -> `Pipeline`. Call the job `monster-monolith`
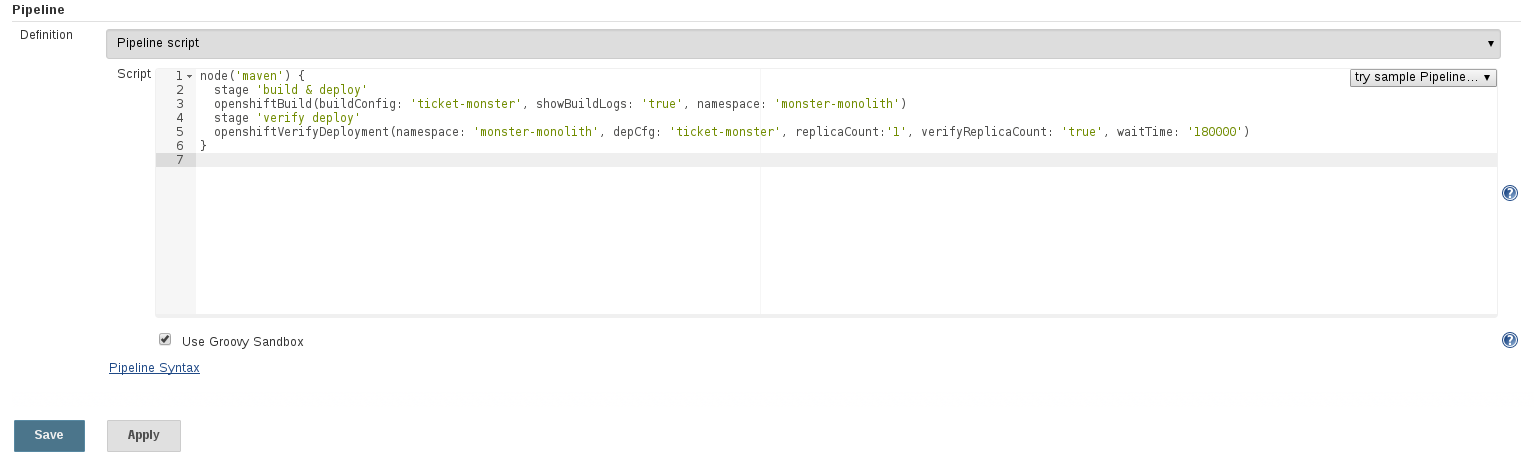
Create the following configuration in the pipeline job and `Save`. This creates a two stage pipeline and uses the Openshift Jenkins pipeline plugin to start a build `openshiftBuild` and then verify we have the correct number of replica pods running `openshiftVerifyDeployment`
node('maven') {
stage 'build & deploy'
openshiftBuild(buildConfig: 'ticket-monster', showBuildLogs: 'true', namespace: 'monster-monolith')
stage 'verify deploy'
openshiftVerifyDeployment(namespace: 'monster-monolith', depCfg: 'ticket-monster', replicaCount:'1', verifyReplicaCount: 'true', waitTime: '180000')
}
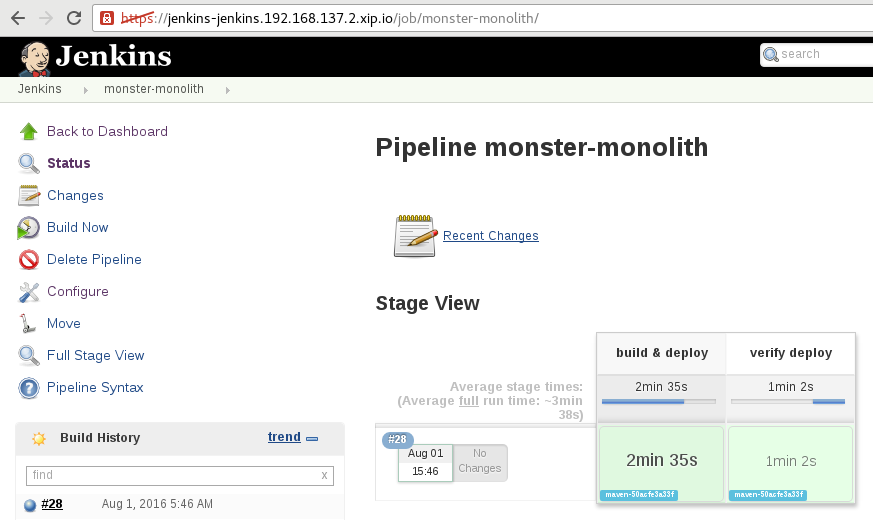
Select `Build Now` for this job. You should see a new build start in Openshift as well as the pipeline in Jenkins. Browse around to check the logs:
**Step 8: Manually push built container image to nexus docker repo**
Nexus3 now supports container images and has an inbuilt registry. We can try this feature out by pushing our built image from the Openshift registry into nexus3. The nexus documentation can be found [here](https://books.sonatype.com/nexus-book/3.0/reference/docker.html#docker-hosted)
Login to Nexus and browse to `Settings` -> `Repository` -> `Create Repository` -> `docker (hosted)`. Also create an `HTTP Connector` for this hosted repository:
Name: nexus-docker
Blob storage: default
HTTP Connector port: 5000
Select `Create repository`
We need to expose this HTTP Service in Openshift:
oc project nexus
oc create -f - <<EOF
apiVersion: v1
items:
- apiVersion: v1
kind: Service
metadata:
creationTimestamp: null
name: nexus-docker
spec:
ports:
- name: 5000-tcp
port: 5000
protocol: TCP
targetPort: 5000
selector:
deploymentconfig: nexus
sessionAffinity: None
type: ClusterIP
status:
loadBalancer: {}
kind: List
metadata: {}
EOF
Now expose this Service as an Openshift Route:
oc create -f - <<EOF
apiVersion: v1
kind: Route
metadata:
name: nexus-docker
spec:
host: nexus-docker.192.168.137.2.xip.io
to:
kind: Service
name: nexus-docker
EOF
Note down the service cluster-ip address created above:
oc get svc nexus-docker
**(Optional)** We can create an `SSL` based service / connector for nexus - this requires you to create certificates - see the details [here](https://support.sonatype.com/hc/en-us/articles/217542177) and add this to the Openshift Route:
- tls:
termination: passthrough
**(Optional)** You can also follow the Openshift documentation to expose a [secure registry](https://docs.openshift.com/enterprise/3.2/install_config/install/docker_registry.html#securing-the-registry)
Now, login to Openshift registry and get the image id:
oc login -u developer
docker login -u developer -e dev@dev.com -p `oc whoami -t` 172.30.160.178:5000
docker images | grep ticket-monster
Now login to the nexus repo:
docker login -u admin -e admin@admin.com -p admin123 172.30.0.237:5000
Tag and push the built image into the Nexus repo manager where `95b519434dc9` is the image id from above, and `172.30.0.237` is the nexus-docker service cluster ip address from above:
oc project monster-monolith
docker tag 95b519434dc9 172.30.0.237:5000/monster-monolith/ticket-monster:latest
docker push 172.30.0.237:5000/monster-monolith/ticket-monster:latest
You should see output similar to:

and in the Nexus UI under the docker registry an entry for our image:

**Future work with nexus (TODO)**
* Integrate an image save as part of our pipeline
* Trigger a pull into another project from nexus
* Use tag+promote strategy with nexus
**Step 9: Configure code quality checks using Sonarqube**
We now want to configure code quality checks from within our Jenkins build pipeline. We need to install and configure maven and the sonarqube runner tool within Jenkins.
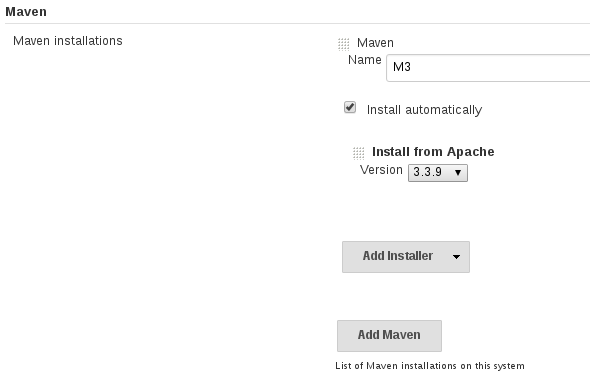
As admin browse to `Jenkins` -> `Manage Jenkins` -> `Configure System` -> select `Install automatically` and call it `Name: M3`
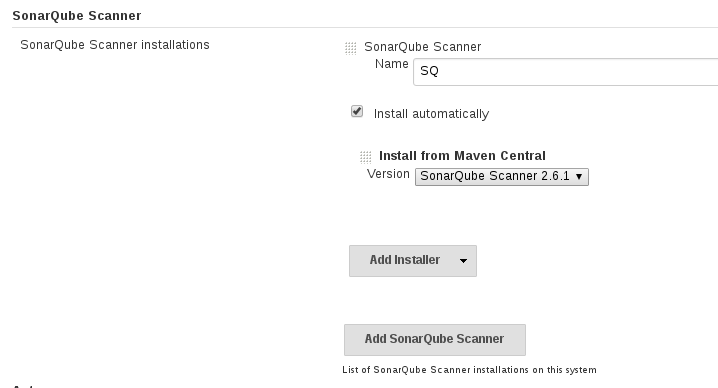
Now configure the `sonar-scanner` plugin. As admin browse to `Jenkins` -> `Manage Jenkins` -> `SonarQube Scanner` installations
Name: SQ
Select 'Install automatically'
Install Version from Maven Central: SonarQube Scanner 2.6.1 (dropdown)
**Note**: If you don't see version drop down to configure, browse to jenkins -> manage jenkins -> plugins -> advanced, select check now. This will populate it.
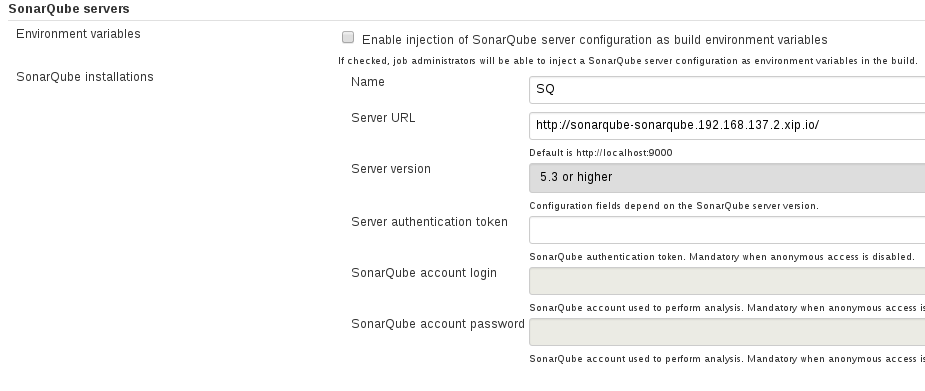
Finally, as admin browse to `Jenkins` -> `Manage Jenkins` -> `SonarQube Servers`
Name: SQ
Server URL: http://sonarqube-sonarqube.192.168.137.2.xip.io/
Server Version: 5.3 or Higher
We can now use the SonarQube scanner in our Jenkins pipeline. Browse back to `Jenkins` -> `monster-mnolith` -> `Configure` job
node('maven') {
stage 'sonarqube'
def sonarHome = tool 'SQ'
git url: "http://gogs-service.gogs.svc.cluster.local:3000/mike/monster-monolith.git", branch: "master"
sonarIP = getIP('sonarqube.sonarqube.svc.cluster.local.')
sh "${sonarHome}/bin/sonar-scanner -Dsonar.projectKey=ticket-monster -Dsonar.projectName=ticket-monster -Dsonar.host.url=http://${sonarIP}:9000 -Dsonar.login=admin -Dsonar.password=admin -Dsonar.projectVersion=1.0.0-SNAPSHOT -Dsonar.sources=demo/src/main/java"
stage 'build & deploy'
openshiftBuild(buildConfig: 'ticket-monster', showBuildLogs: 'true', namespace: 'monster-monolith')
stage 'verify deploy'
openshiftVerifyDeployment(namespace: 'monster-monolith', depCfg: 'ticket-monster', replicaCount:'1', verifyReplicaCount: 'true', waitTime: '180000')
}
// Get A Service Cluster IP
def getIP(String lookup){
sh "getent hosts ${lookup} | cut -f 1 -d \" \" > ipaddress"
ipaddress = readFile 'ipaddress'
ipaddress = ipaddress.trim()
sh 'rm ipaddress'
return ipaddress
}
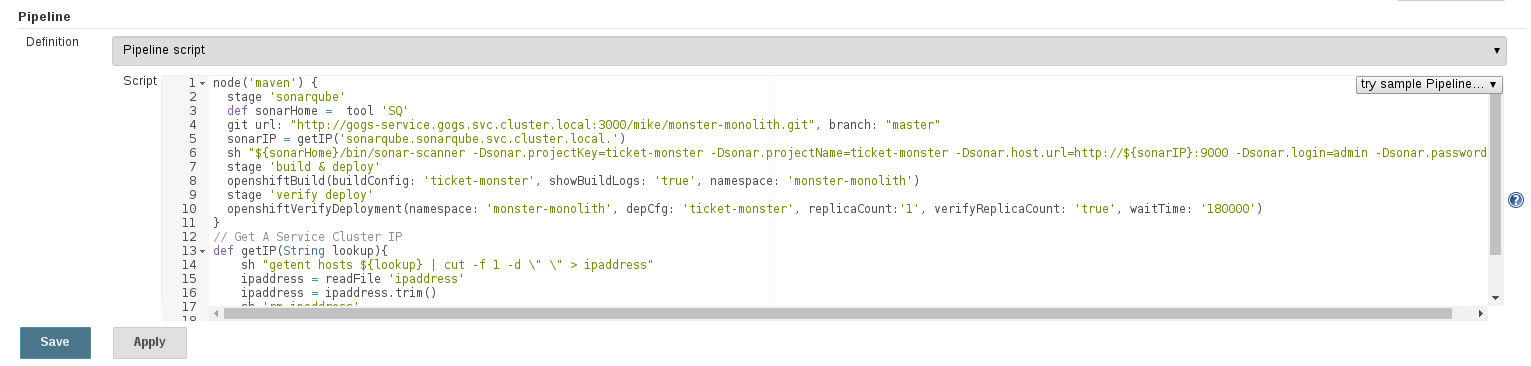
Select `Save`
Execute a Build of this job now. You should see a sonarqube step.
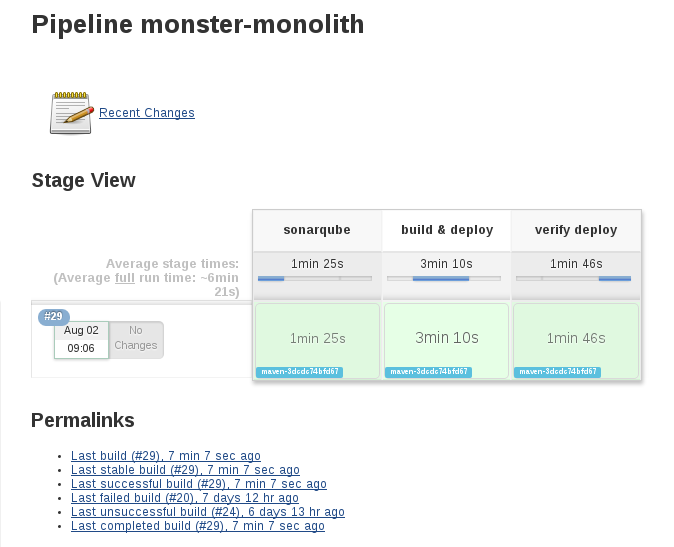
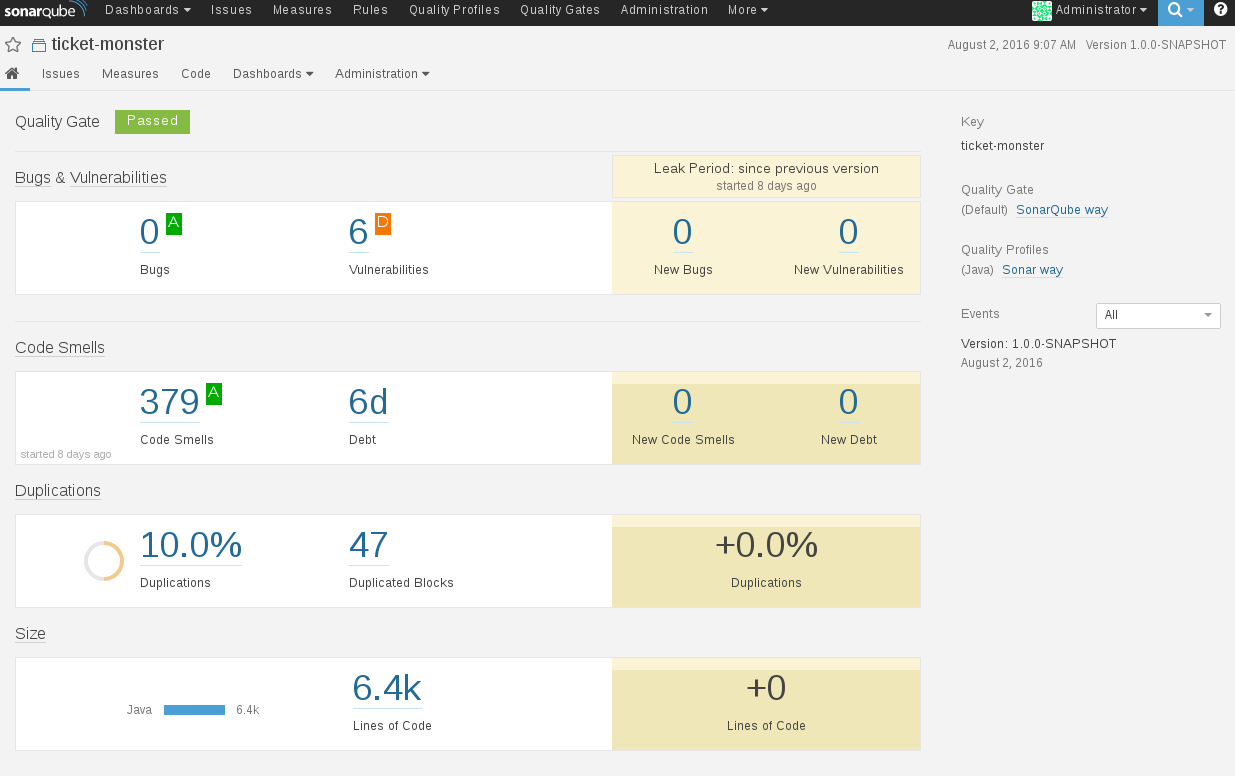
Once complete, we can browse to SonaQube and check out the code quality:
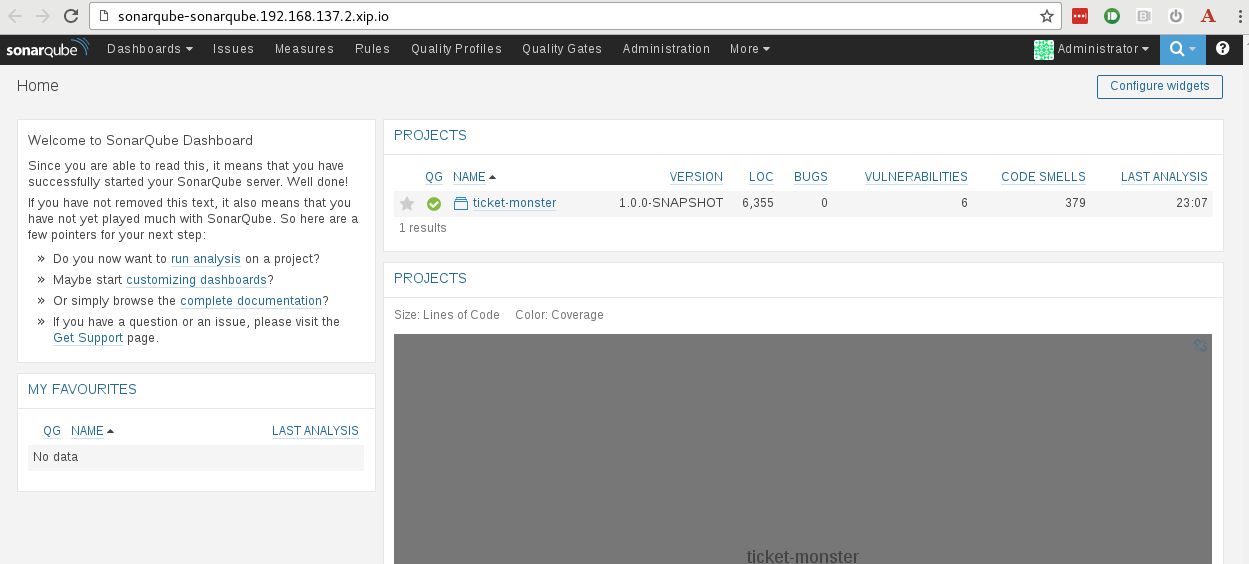
Drilldown into the project:
**Step 10: Configure a Gogs WebHook**
It would be great if Gogs could trigger our Jenkins Pipeline build when we push a change of code. That way we get an automated build deploy and code quality check on every code commit an push.
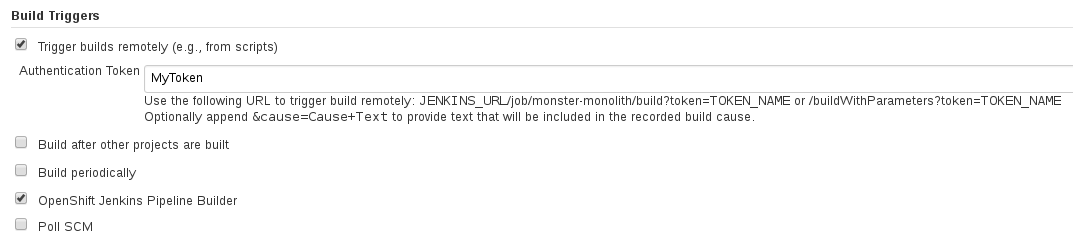
Browse to `Jenkins` -> `monster-monolith` job -> `Configure` -> select `Trigger Builds Remotely` and enter a token e.g. `MyToken`
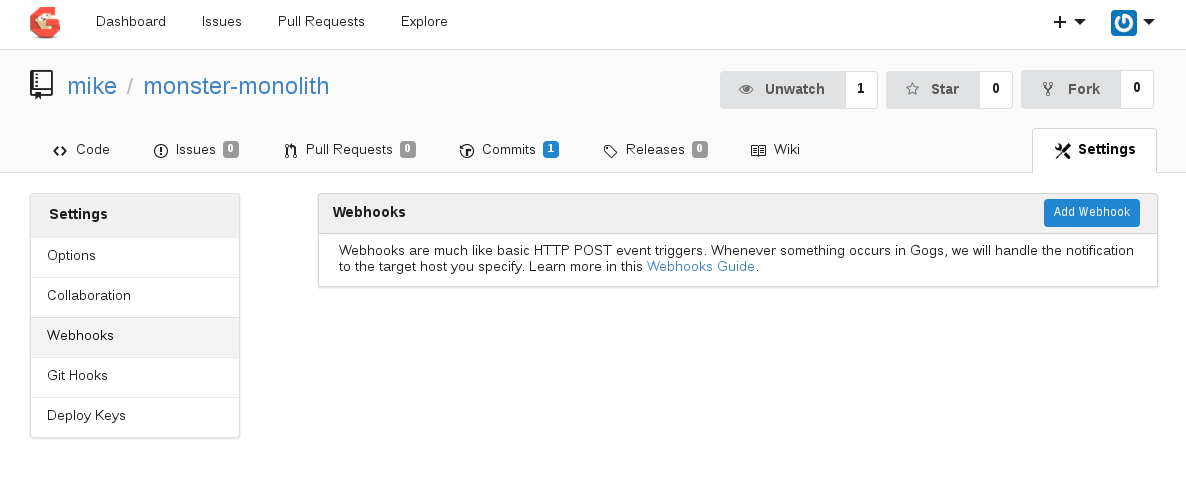
Browse to `Gogs` -> `monter-monolith` project `Settings` -> `Webhooks`
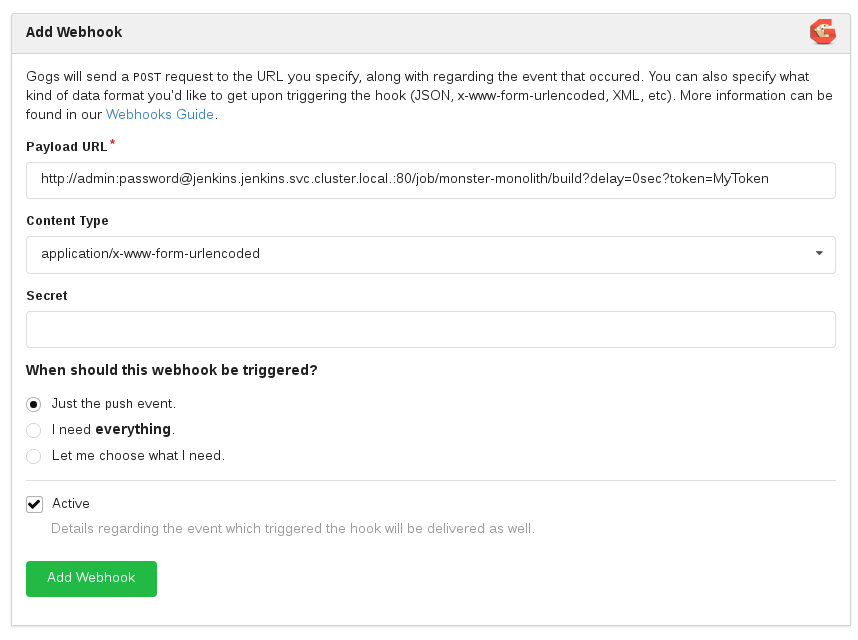
`Add Webhook` with the following details:
Payload URL: http://admin:password@jenkins.jenkins.svc.cluster.local.:80/job/monster-monolith/build?token=MyToken
ContentType: application/x-www-form-urlencoded
When should this webhook be triggered ?: "Just push the event"
Select `Add Webhook`
Lets try it out by making a code change to our Ticket Monster Application.
Edit the main title page:
vi ./demo/src/main/webapp/resources/templates/desktop/home.html
-- Change the Title
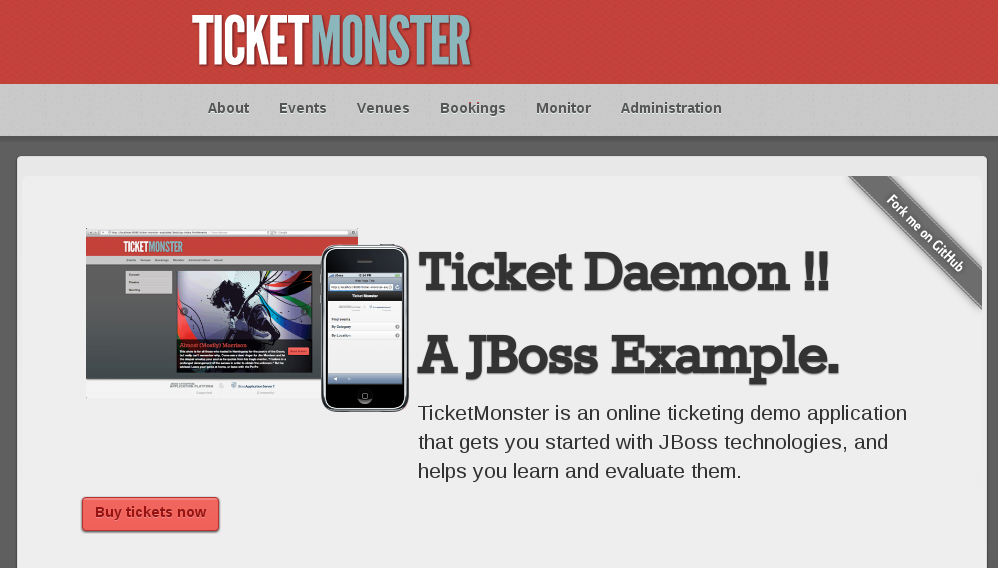
<p><h1 class="special-title">Ticket Daemon !!</h1></p>
git add ./demo/src/main/webapp/resources/templates/desktop/home.html
git commit -m "title updated"
git push
This should trigger a build in Jekins. You can see the webhook trigger details in gogs:

And the new build is started in Jenkins:
Once the application pipeline is complete, browse to the Ticket Monster webpage and you should see your changes:
##Summary##
Congratulations ! You have successfully:
- TODO - Microservice TicketMonster deployment still to come...