#**Lab 15: Create a build pipeline using Jenkins**
In this lab we will deploy a jenkins image and use it to build our development environment.
From there we will promote the built image into our test/QA environment from jenkins.
We will be using a jenkins image built from the `openshift/jenkins-1-centos7` image.
The source code for this jenkins image is in [github](https://github.com/openshift/jenkins) and examples of its use
can be found [here](https://github.com/openshift/origin/tree/master/examples/jenkins) and [here](https://github.com/openshift/jenkins-plugin)
for the jenkins kubernetes plugin.
**Step 1 - Create Projects**
Create three projects. Name them "development-jenkins-username" and "testing-jenkins-username" and "infra-jenkins-username"
**Remember** to substitute the username.
$ oc new-project development-jenkins-username --description="development-jenkins-username" --display-name="development-jenkins-username"
$ oc new-project testing-jenkins-username --description="testing-jenkins-username" --display-name="testing-jenkins-username"
$ oc new-project infra-jenkins-username --description="infra-jenkins-username" --display-name="infra-jenkins-username"
**Step 2: Provide ImagePuller Access to the Test Project from Development Project**
The following command will allow the Test project to be able to pull the docker images from the Development project.
Run this from your "testing-username" project.
$ oc project testing-jenkins-username
$ oc policy add-role-to-group system:image-puller system:serviceaccounts:testing-jenkins-username -n development-jenkins-username
**Step 3 - Create a Jenkins Service Account for all projects to use**
As a cluster administrator, we are going to create a jenkins account that we can use for all of our projects.
Of course it is totally possible to have a service account per project if desired.
$ oc project default
$ oc create -f - <<EOF
{
"apiVersion": "v1",
"kind": "ServiceAccount",
"namespace" : "default",
"metadata": {
"name": "jenkins"
}
}
EOF
We need to grab the authentication token from this service account to use later in our jenkins jobs.
$ oc describe serviceaccount jenkins -n default
Name: jenkins
Namespace: default
Labels: <none>
Image pull secrets: jenkins-dockercfg-ce63t
Mountable secrets: jenkins-token-nuari
jenkins-dockercfg-ce63t
Tokens: jenkins-token-nuari
jenkins-token-o7e2t
Inspect the Token:
$ oc describe secret jenkins-token-nuari -n default
Name: jenkins-token-nuari
Namespace: default
Labels: <none>
Annotations: kubernetes.io/service-account.name=jenkins,kubernetes.io/service-account.uid=8d41964d-8b1c-11e5-b25b-525400b36d1d
Type: kubernetes.io/service-account-token
Data
====
ca.crt: 1066 bytes
token: eyJhbGciOiJSUzI1NiIsInR5cCI6IkpXVCJ9.eyJpc3MiOiJrdWJlcm5ldGVzL3NlcnZpY2VhY2NvdW50Iiwia3ViZXJuZXRlcy5pby9zZXJ2aWNlYWNjb3VudC9uYW1lc3BhY2UiOiJkZWZhdWx0Iiwia3ViZXJuZXRlcy5pby9zZXJ2aWNlYWNjb3VudC9zZWNyZXQubmFtZSI6ImplbmtpbnMtdG9rZW4tbnVhcmkiLCJrdWJlcm5ldGVzLmlvL3NlcnZpY2VhY2NvdW50L3NlcnZpY2UtYWNjb3VudC5uYW1lIjoiamVua2lucyIsImt1YmVybmV0ZXMuaW8vc2VydmljZWFjY291bnQvc2VydmljZS1hY2NvdW50LnVpZCI6IjhkNDE5NjRkLThiMWMtMTFlNS1iMjViLTUyNTQwMGIzNmQxZCIsInN1YiI6InN5c3RlbTpzZXJ2aWNlYWNjb3VudDpkZWZhdWx0OmplbmtpbnMifQ.C2OKUSayCXBUjbcwOM0FHOzXczkdJKS_97rMnmZLl4m4efkG5uJdqeg5AZDvs1hA8jXeoe8Z8wgfhLwNuSKyslArRu-rjncJFkLjzc-2gUfq0nxHBugDSFlk26VcCoBgoPlrzqH8RxtPFLoEt2ncesyfWfIvsLqx7EjBbUsDKZKlRmtcVZM1HbxO57lsEMZDytkkzKI7Cx9ZeV6fWwwZxCgKMj4-KXCWqObM8fh6XPtlDNaotvzkuSRBnndash2NgOZrXpL9MaIdEKob4JacYFZNqZWWhLf3_d6DY9D0orq3fxRymEPchh_vD657_wXAjhq2jaDFzQwyd34aHjJkyg
We will use this token field later.
**Step 4 - Add jenkins service account to our projects and install templates**
We need to allow the jenkins service account `edit` access to our projects. **Remember to replace with your username**
$ oc project development-jenkins-username
$ oc policy add-role-to-user edit system:serviceaccount:default:jenkins
$ oc project testing-jenkins-username
$ oc policy add-role-to-user edit system:serviceaccount:default:jenkins
We are going to use templates to build and install Jenkins and a jenkins slave builder image.
Install the Jenkins templates into our infra project.
$ oc project infra-jenkins-username
$ oc create -f https://raw.githubusercontent.com/eformat/jenkins/master/examples/master/jenkins-with-k8s-plugin.json
**Step 5 - Deploy a jenkins master**
Lets deploy our master jenkins server. Note we are using the ephemeral version of jenkins, so logs and config won't survive a restart.
See above links for using the version with a persistent volume attachment to make your jenkins server permanent.
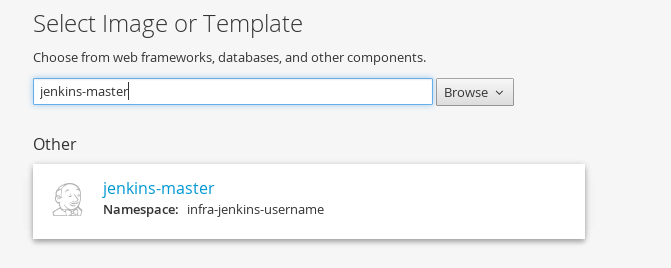
`Add to Project` using the jenkins-master template we loaded in step.4
I have created some sample jenkins jobs and plugins file in github, so we will use this repository for building jenkins.
Override one template value (all the rest remain the same):
JENKINS_S2I_REPO_URL: https://github.com/eformat/jenkins.git
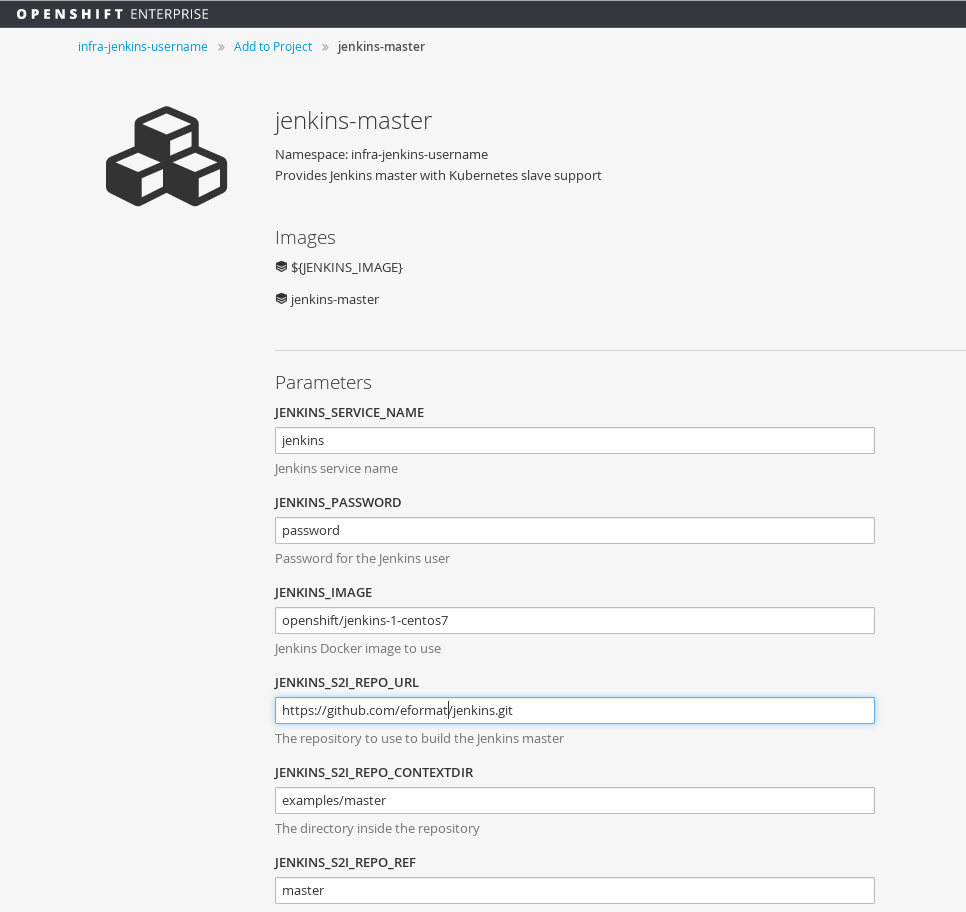
and then select `Create`
The build will take several minutes to complete as it installs the required plugins on top of the jenkins builder image.
Once the build completes, you should be able to browse to jenkins URL and login using the credentials provided in the template.
The defaults were:
user: admin
password: password
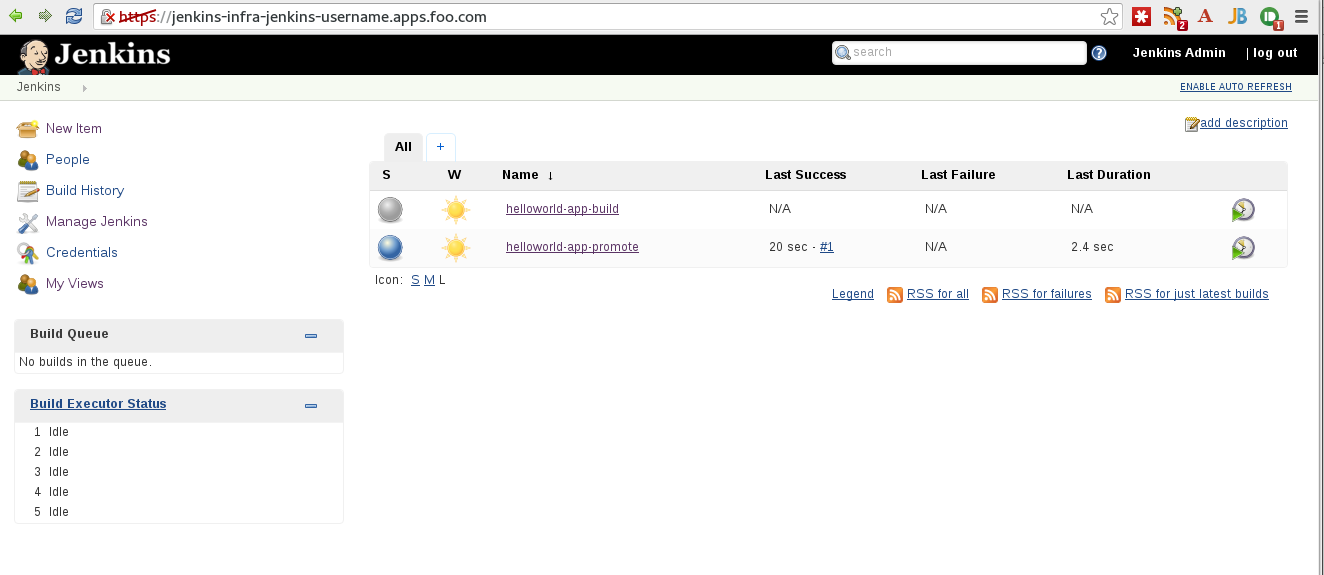
Don't worry if one of the project has a fail status, that's OK, we haven't configured it yet.
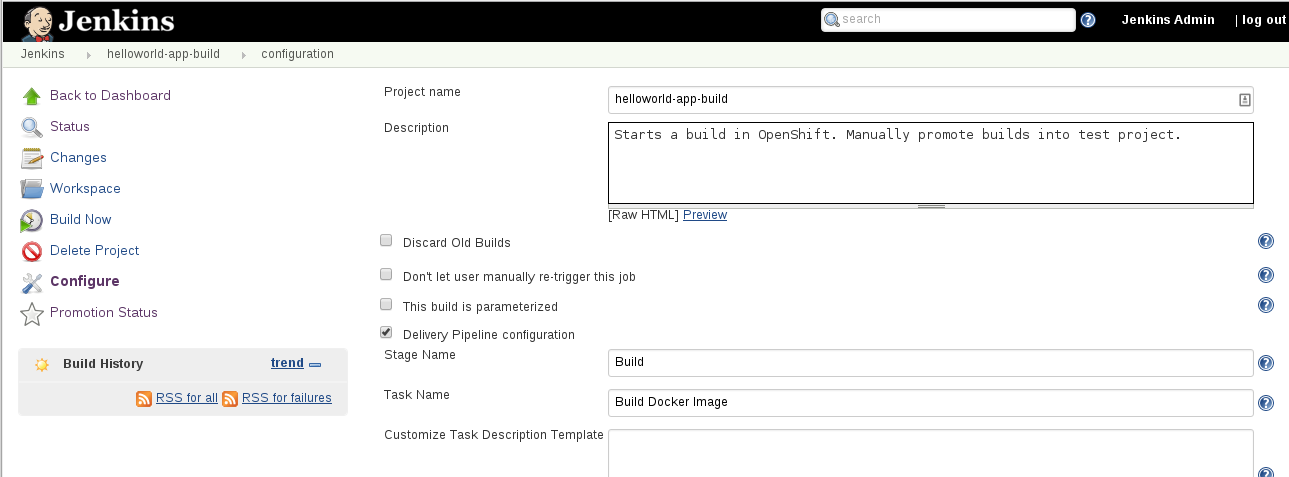
Explore the `helloworld-app-build` and `helloworld-app-promote` projects. Select the link and select `Configure`.
You will see a number of things:
- OpenShift and Kubernetes plugin configuration for building an openshift project
- Promoted builds plugin usage and integration with image tagging in openshift
- Testing and scaling of replication controllers from jenkins
**Step 6 - Create our development application**
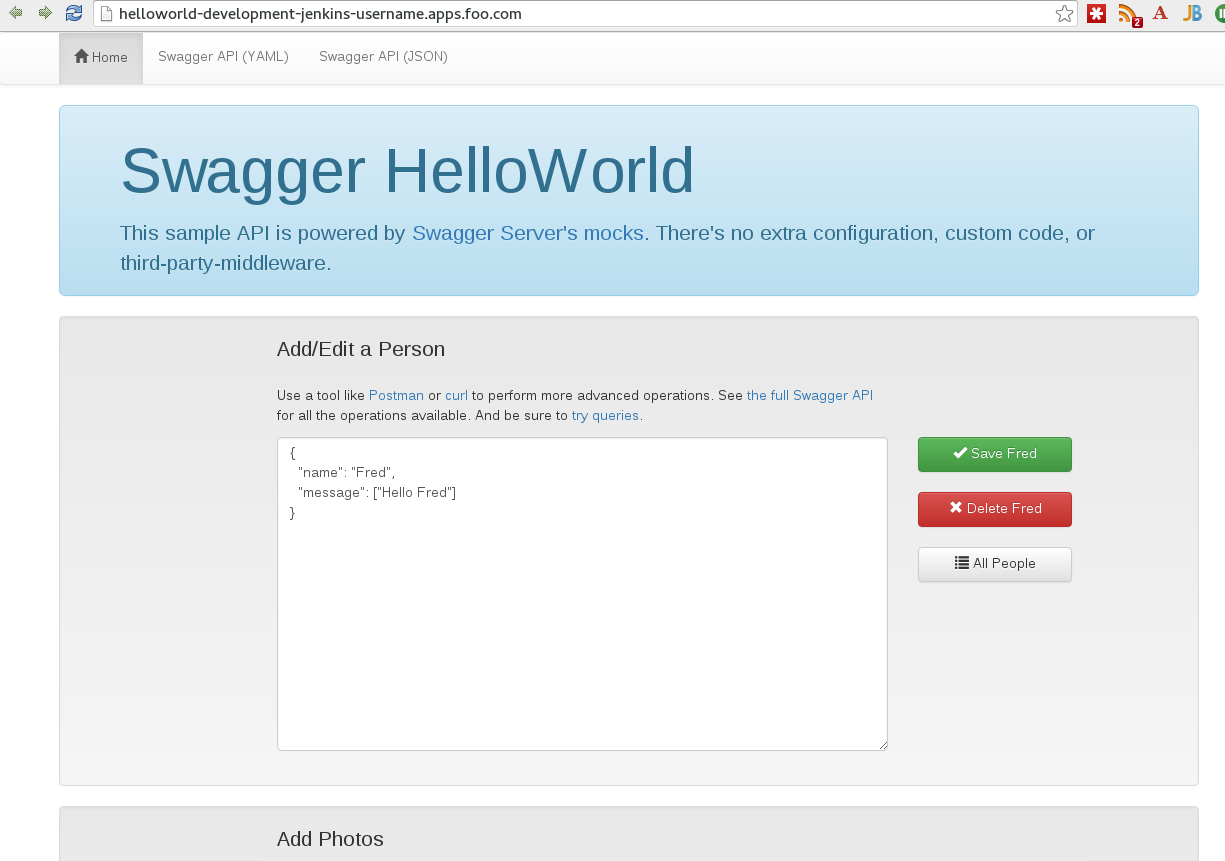
We are going to create our application code using nodejs and swagger api as an example.
You can fork this github repo if you want to make changes to it, or configure github webhooks for automated builds.
$ oc project development-jenkins-username
$ oc new-app https://github.com/eformat/node-hello-world-swagger.git --name=helloworld --strategy=sti
Expose a route for our service:
$ oc expose svc helloworld --hostname=helloworld-development-username.apps.foo.com
You should now be able to browse to your running development application.
**Step 7 - Configure the development project jenkins build jobs**
Browse to the `helloworld-app-build` configuration page in Jenkins:
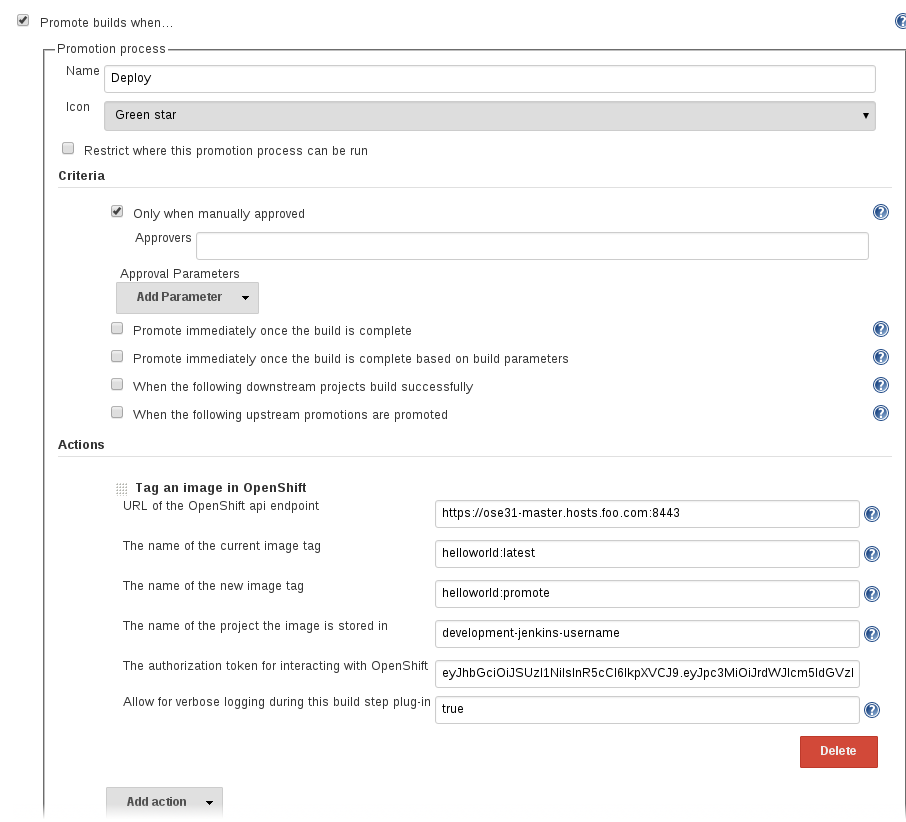
Set the follows parameters suitable for your environment (i.e. replace your **username** and **master** url and **auth token**) into
the `Promote builds when...` Action section:
URL of the OpenShift api endpoint: https://ose31-master.hosts.foo.com:8443
The name of the project the image is stored in: development-jenkins-username
The authorization token for interacting with OpenShift: <jenkins auth token>
Do the same for the `Build` section. Replace:
URL of the OpenShift api endpoint: https://ose31-master.hosts.foo.com:8443
The authorization token for interacting with OpenShift: <jenkins auth token>
The name of the project the BuildConfig is stored in: development-jenkins-username
The name of the project the DeploymentConfig is stored in: development-jenkins-username
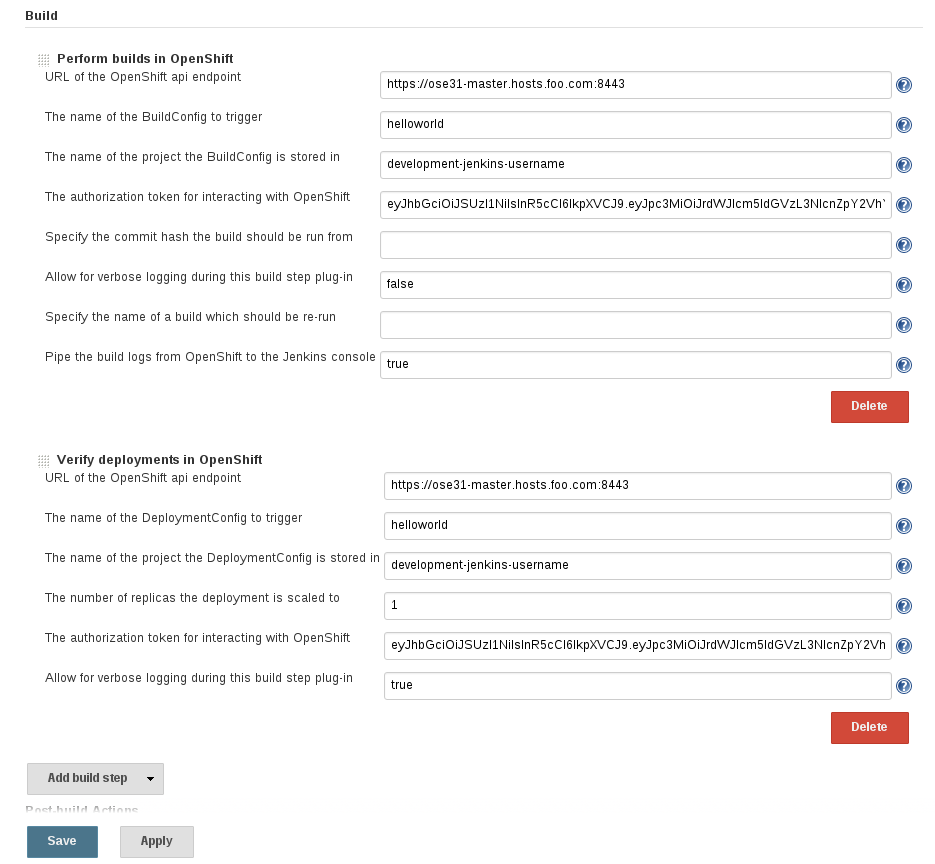
Select `Save`
**Step 8 - Configure the promote jenkins job**
Perform the same configuration steps for the `helloworld-app-promote` jenkins job. (i.e. replace your **username** and
**master** url and **auth token**)
Replace:
URL of the OpenShift api endpoint: https://ose31-master.hosts.foo.com:8443
The authorization token for interacting with OpenShift: <jenkins auth token>
The name of the project the BuildConfig is stored in: development-jenkins-username
Be sure to do this in the `Source Code Management` and `Build` sections.
**Step 9 - build development project**
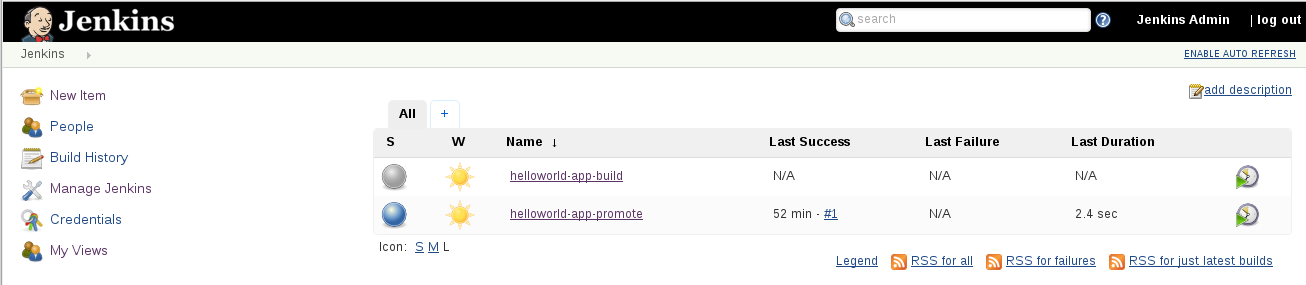
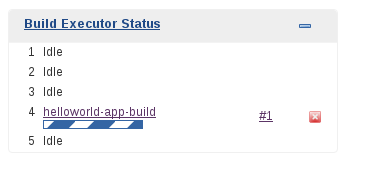
Go back to the top level home page, and click on the timer `Schedule a build..` for `helloworld-app-build`.
You can also click on the job and select `Build Now`
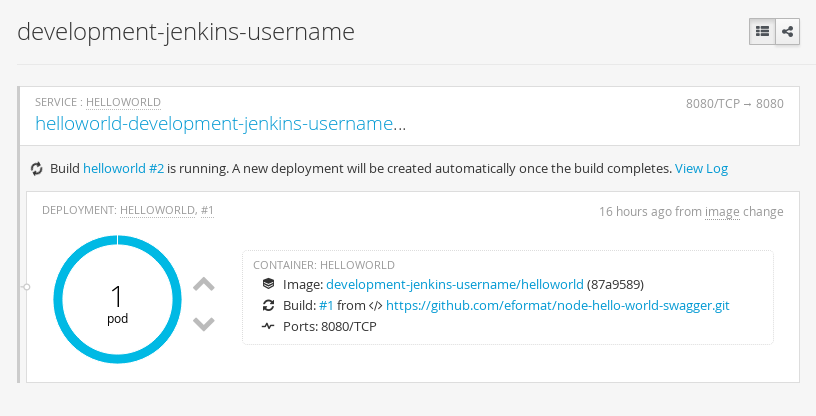
This will start a build. Select `Console` to follow the logs. You should also see the build (in this case build#2) in OpenShift web console of you development project.
You can see the logs in jenkins by selecting the build status and Console. Note: jenkins may buffer the logs, so they
don't appear straight away.
Because we are using the default Rolling Deploying in our build configuration a new image automatically spins up in our
pod once the build completes successfully.
**Step 10 - promote the development build**
Once you have a successful development build, we can use the promotion plugin to tag this image so we can use it in our
test project.
**Remember** There are endless possibilities here for pipeline configuraiton of combined automated and manual workflows.
Go back into the successful development build (select the build#) and select the `Promotion Status` star
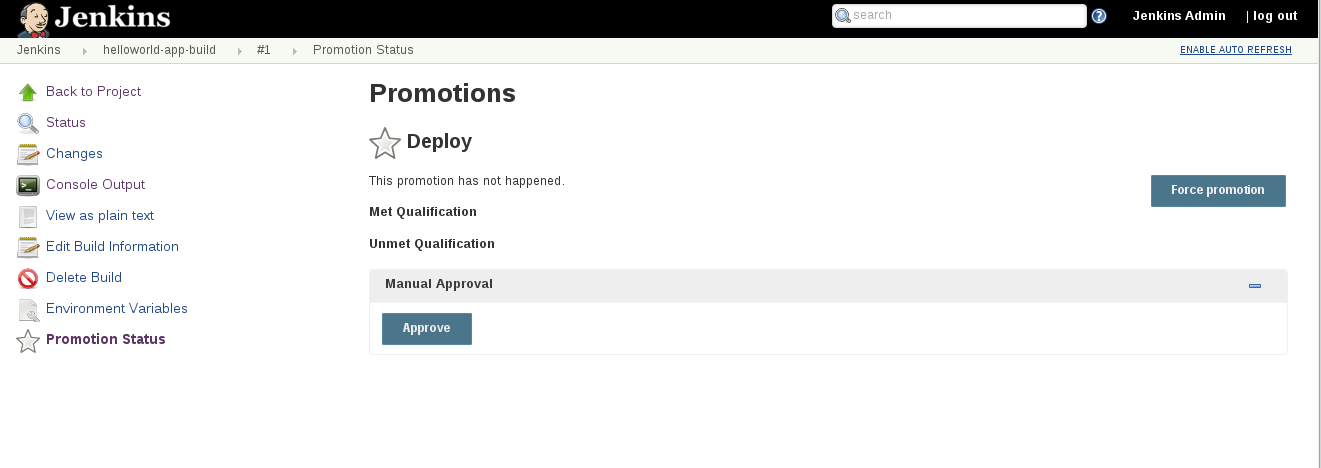
Select the Manual Approve `Approve` button.
By approving the build, the job tags the built image stream with a `:promote` tag.
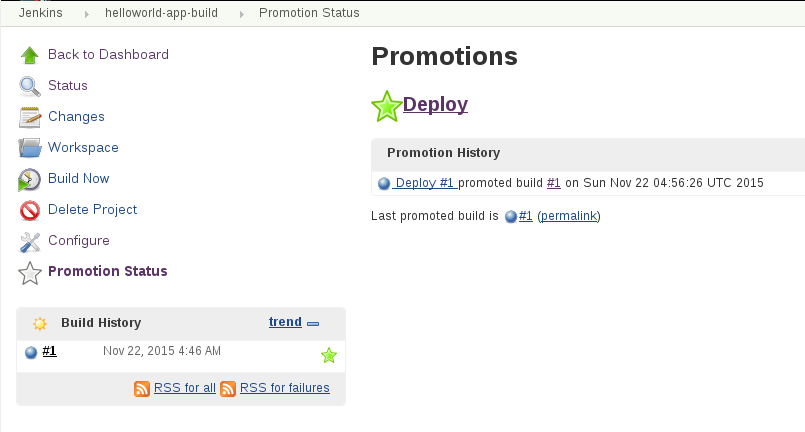
You can see the promotion log history now:
BUILD STEP EXIT: OpenShiftImageTagger image stream now has tags: helloworld:latest, helloworld:promote
build com.openshift.openshiftjenkinsbuildutils.OpenShiftImageTagger@71ec713f SUCCESS
Finished: SUCCESS
**Step 11 - create the test jenkins job**
We can now use the promoted build image directly in our test project:
$ oc project testing-jenkins-username
$ oc new-app development-jenkins-username/helloworld:promote --name=helloworld
$ oc expose service helloworld --hostname=helloworld-test-username.apps.foo.com
You should see your test pod spin up pretty quickly because we are not having to do a source build.
The test project is configured using the promote tag and the OpenShift deployment config is set to trigger a redeploy (rolling)
every time you promote a development build image.
The jenkins promote job polls OpenShift for an image stream change and verifies that 1 replica pod is spun up.
**Step 12 - More builds and promotions**
Try out more builds and verify for yourself that the image tags and streams match what you expect.
##Summary##
You have successfully:
- built and deployed an STI jenkins slave builder image stream
- deployed a master jenkins server
- configured a development build job that interacts using the jenkins plugin to interact with OpenShift
- used the promotion plugin to tag a built image and deploy that into a test project
**(Optional) - Jenkins Slave STI Builder images**
If using slave jenkins - we need to build on top of a nodejs STI builder image to make it into a
kubernetes jenkins slave image. This allows us to integrate a lot better with the jenkins slave plugins.
A good blog for setting up jenkins slaves is [here](https://blog.openshift.com/jenkins-slaves-in-openshift-using-an-external-jenkins-environment/)
You can layer jenkins on top of any STI builder image. Note: the yum update process fails at the moment for RHEL STI based images, so
we will use centos based ones for now.
Create slave template:
$ oc project infra-jenkins-username
$ oc create -f https://raw.githubusercontent.com/eformat/jenkins/master/examples/slave/s2i-slave-template.json
Go into your infra-jenkins-username project in the Web Console, select `Add to Project` and select the `s2i-to-jenkins-slave` template.
Fill in:
**IMAGE_STREAM_NAME**: nodejs-010-centos7
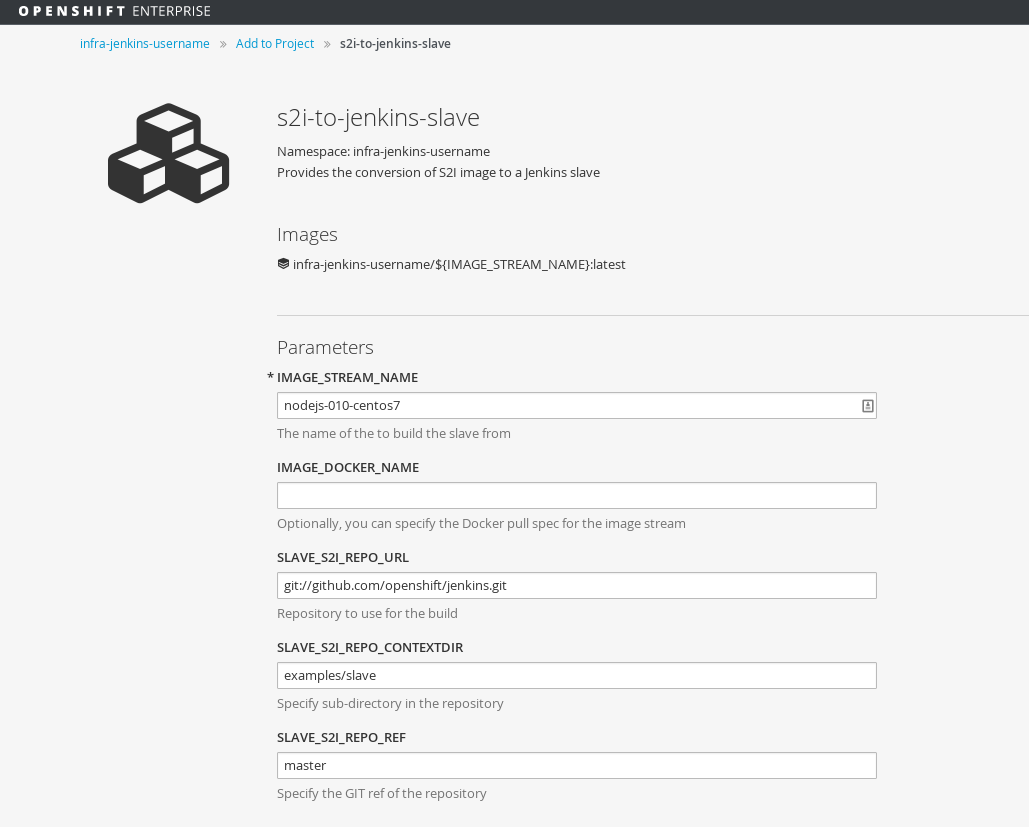
Hit the `Create` button. Browse to `Builds` and you should see a build of the slave image starting. Note: it may take some time if this
is the first time you have pulled this docker image.
Once the build is complete, we will be able to reuse this ImageStream in our jenkins slave builder pod.

**(Optional) - Jenkins Workflow Plugin - the future is now**
Traditionally Jenkins has been the most popular CI tool around. Now Jenkins 2.0 is now being positioned as a Continuous Delivery tool;
due to the Jenkins Workflow plugin being capable of orchestrating long running arbitrary processes
(builds / tests / promotions / approvals / code reviews et al).
So the Jenkins Workflow plugin can be used to define CD pipelines in a “Jenkinsfile” with sequential/parallel or fork/join steps.
Each step could be anything at all (a build in an external CI tool, a docker build, an OpenShift build, a stage command using Helm,
some nodejs stuff, an ansible command, the options are limitless). Jenkins Workflow plugin takes care of keeping track of
which steps have completed; passing state between steps (e.g. the new version number being built/tested) and dealing with
async / concurrency / restarts / fork/joins etc.
Whats missing from Jenkins is the rest of the platform though ;) hence RedHat is looking to help provide a consolidated Developer
console, Developer Tools and Experience with RHEL, Atomic & OpenShift as the underlying runtime platform using integration with
ChatOps, Nexus, Gerrit, SonarQube, Git Repos, issue trackers et al etc.
Some References:
- [Jenkins workflow plugin tutorial](https://github.com/jenkinsci/workflow-plugin/blob/master/TUTORIAL.md)
- [Create and explore continuous delivery pipelines](https://medium.com/fabric8-io/create-and-explore-continuous-delivery-pipelines-with-fabric8-and-jenkins-on-openshift-661aa82cb45a#.ufeoks81s)
- [Automation of Continous Deployment for Microservices](https://medium.com/fabric8-io/automation-for-microservices-5a8ed0ea100d#.6s6wx12oj)
##**Summary**##
Congratulations ! You have successfully built and promoted an application using Jenkins CI