oracle-rhel5-notes v.6.2 - BETA - (C) 2006-2009 Red Hat, Inc.

Oracle is a registered trademark of Oracle Corporation.
Oracle9i is a trademark of Oracle Corporation.
Oracle10g is a trademark of Oracle Corporation.
All other trademarks are property of their respective owners.

Warning: BETA / WORK IN PROGRESS

The information contained herein may be incomplete. If anything is missing or requires clarification, please add a comment with the missing information to: Bug #182423. The most up-to-date version of the oracledb.sh script referenced is here. This version changes the types available:

Introduction & Scope

This is a brief HOWTO which should help an experienced system administrator get Oracle(R) 10g Release 2 installed for cold failover cluster operation on Red Hat Enterprise Linux 5. The installation of the database is performed only once, rather than once per node. This is provided as an alternative to using Oracle Clusterware to perform failover. This kind of setup is mutually exclusive with RAC configurations. More to the point - when using RAC, RHCS4 does not need to be used to manage the Oracle instance.

This documentation is not intended as a replacement for any documentation concerning Red Hat Enterprise Linux or Oracle 10g Release 2 operations or installation. In order for this HOWTO to be beneficial, you must have knowledge about how to administer Red Hat Enterprise Linux 5 and Oracle 10g Release 2

Documentation on Oracle Database 10g Release 2 may be found at the following address:
http://www.oracle.com/pls/db102/homepage

Red Hat Enterprise Linux Documentation may be found here:
http://www.redhat.com/docs/manuals/enterprise/

Part 1: Individual Cluster Node Configuration

Perform the following steps on all nodes in the cluster. Also perform any related tasks as referenced by the Oracle installation documentation. If this HOWTO and the Oracle installation documentation conflict, the Oracle documentation should be followed, especially with respect to configuring sysctl parameters and RPM installations.
  1. STOP ALL CLUSTER DAEMONS AND SERVICES.
  2. Create an Oracle user. The installation will not work if run as root.
        # useradd oracle
        # passwd oracle
      
    The oracle UIDs and GIDs must be the same on all cluster nodes. Make sure they match by looking at /etc/passwd and /etc/groups. If the UID/GIDs do not match, Oracle will not run. The password should be the same for the Oracle user on all nodes as well.
  3. Edit /etc/sysctl.conf and add these lines:
        kernel.sem = 250 32000 100 128
        kernel.shmmax = 536870912
        fs.file-max = 65536
        net.core.rmem_default = 262144
        net.core.rmem_max = 262144
        net.core.wmem_default = 262144
        net.core.wmem_max = 262144
        net.ipv4.ip_local_port_range = 1024 65000
      
    Run:
        # sysctl -f /etc/sysctl.conf
      
    Repeat for all nodes in the cluster.
  4. Install these RPMs if you do not have them already:
        compat-libstdc++-33-3.2.3
        libaio-0.3.*
        glibc-devel-2.3.4
      
    There may be more which are not on this list. REFER TO THE ORACLE INSTALLATION DOCUMENTATION FOR MORE INFORMATION Ensure all of the development tools (gcc, binutils, etc.) installed as well.
  5. Create the Oracle mountpoint(s); e.g.:
      mkdir /mnt/oracle
      
  6. Install the oracledb.sh resource agent in to /usr/share/cluster

Part 2: Oracle Installation and Basic Tests

The following steps should be performed on one node only.
  1. Choose the partition(s) you want to use for Oracle and format them using the file system of your choice. In my example, I used /dev/sdb7 (a partition on a shared Winchester OpenRAID array) formatted with the ext3 file system.
        # mke2fs -j /dev/sdb7
      
  2. Add the virtual IP you intend to use for the system. As with all virtual IPs managed by Red Hat cluster software, the virtual IP used for Oracle must be in the same subnet as an existing IP address on the system. In my case, I chose 192.168.1.20 (my main eth0 IP is 192.168.1.40).
        # ip addr add 192.168.1.20/24 dev eth0
      
  3. Mount the target Oracle partition(s). I used only /dev/sdb7, and I chose /mnt/oracle as the target for Oracle. Change the ownership of the root mount point(s) or the subdirectory in which you intend to install Oracle and/or its data.
        # mount -t ext3 /dev/sdb7 /mnt/oracle
        # chown oracle.oracle /mnt/oracle
      
  4. Run the Oracle installer. I am not a DBA, and I do not know anything about what problems you might hit during install. I just accepted the defaults (except for the Oracle Home and Oracle Inventory directories) and used "oracle" as the database password. If you have any trouble with the installation, refer to the Oracle documentation.

    The Oracle installer must be run as the Oracle user. I had to add -ignoreSysPrereqs in order to allow the installer to run on RHEL5.
        # su - oracle
        $ cd /mnt/oracle_install
        $ export ORACLE_HOSTNAME=svc0.foo.test.com
        $ ./runInstaller OUI_HOSTNAME=svc0.foo.test.com -ignoreSysPrereqs
      

    Here are some screenshots to give you an idea of how I installed it.
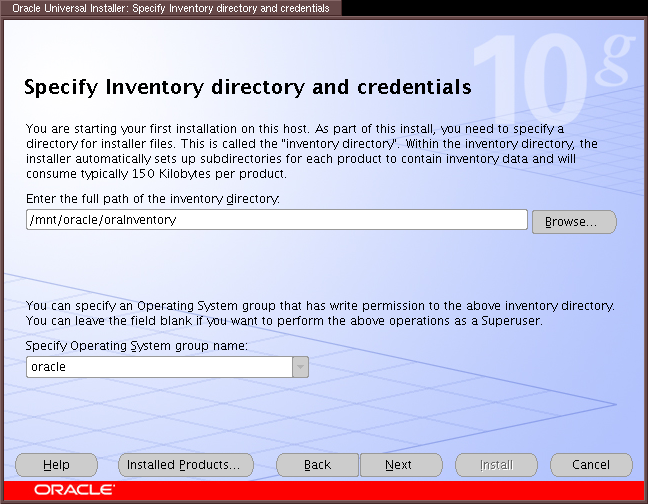

    Install everything on shared storage - even the oraInventory parts
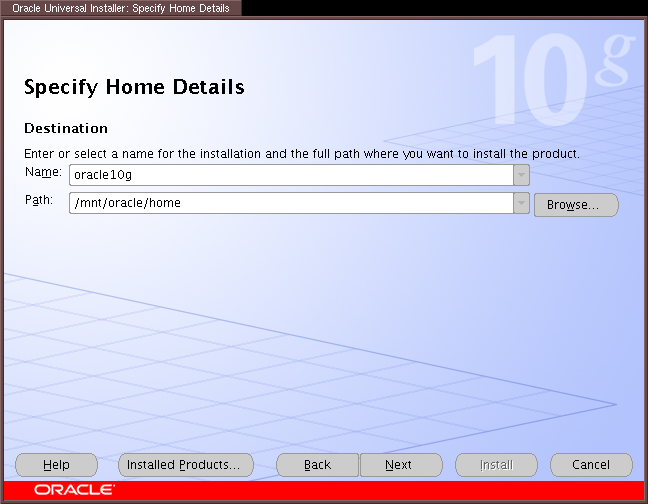

    I used /mnt/oracle/home as my Oracle Home Directory
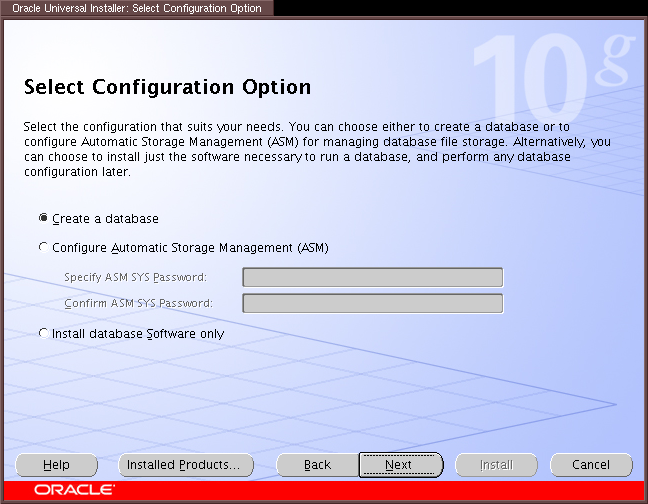

    Defaults.
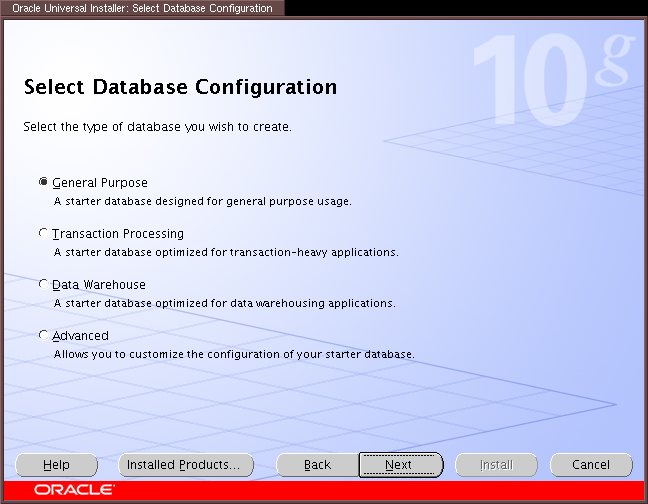

    Defaults.
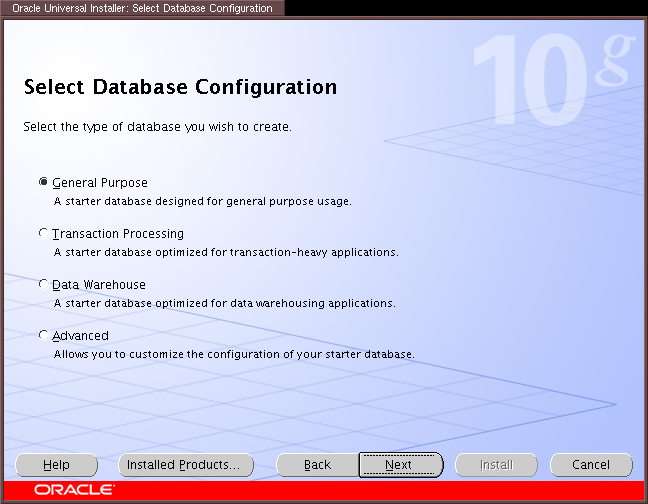

    Defaults.
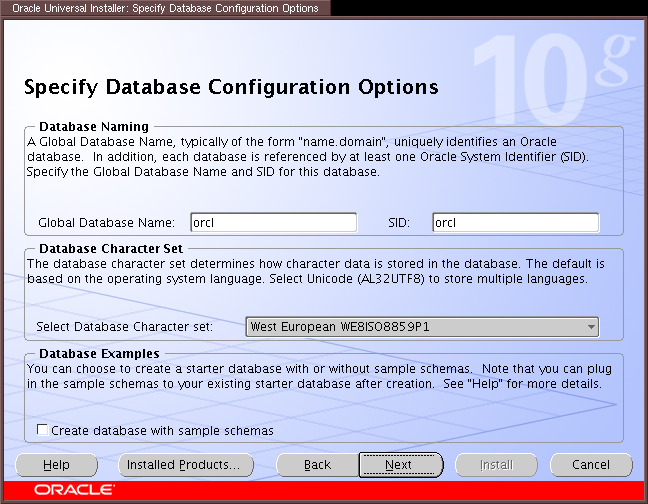

    Defaults.
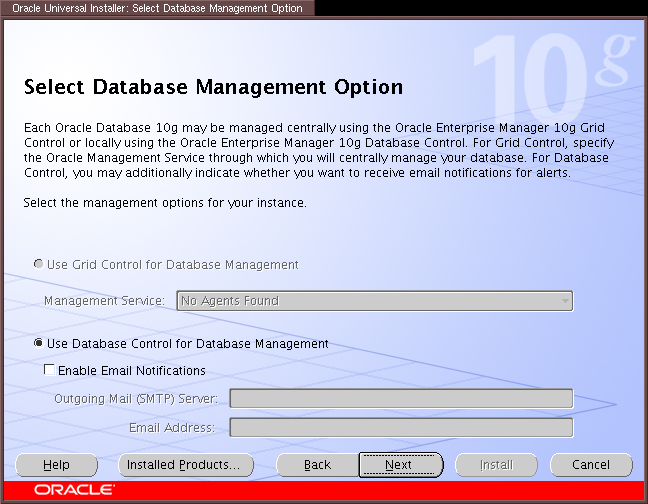

    Defaults.
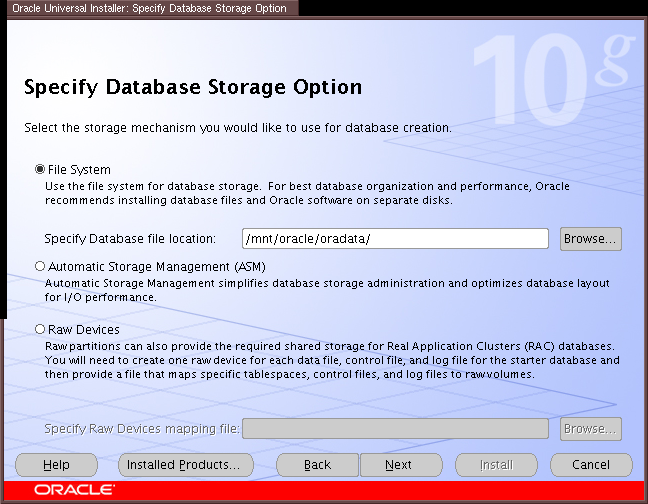

    Defaults.
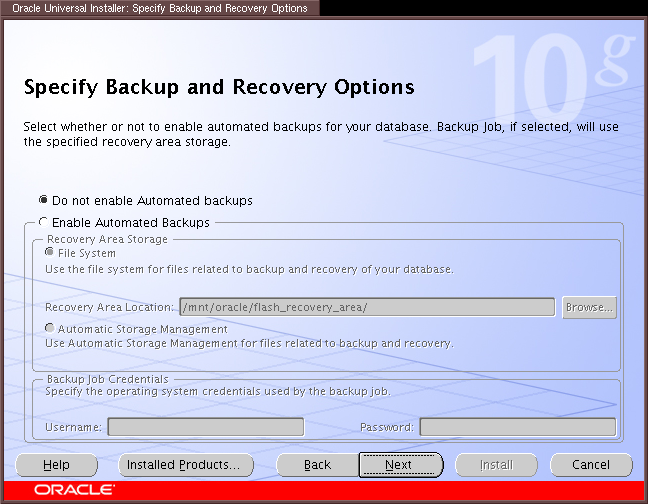

    Defaults.


    Specify passwords for administration accounts.
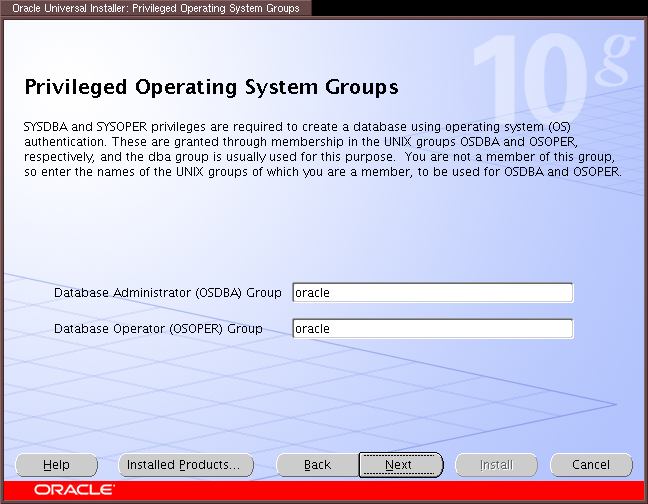

    Make sure these match your OS group names.
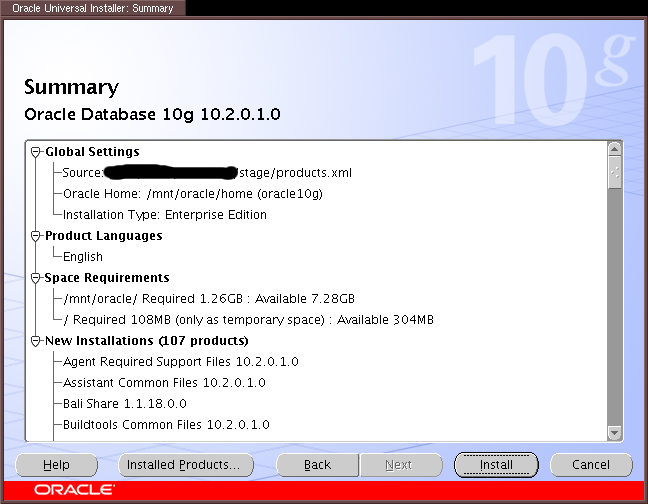

    Ready to install.
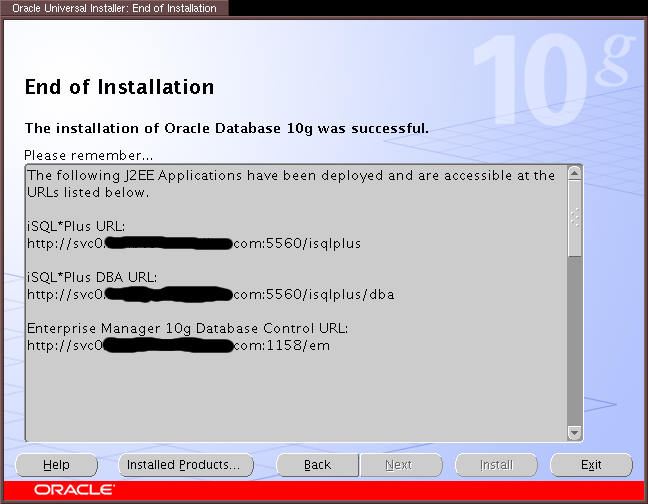

    Installation complete.

    Note: If installation fails for any reason, please consult Oracle's Documentation
  5. Test the database by logging in to the Database's Enterprise Management Console to make sure everything is working. You will need to refer to the URL you were given by the Oracle installer. In my case, it was:
         http://svc0.foo.test.com:1158/em
    
         Login: SYS
         Password: (your password)
         Connect As: SYSDBA
      
  6. Ensure the Oracle listener is configured to talk to the database. On my system, I had to change the SID_LIST_LISTENER in $ORACLE_HOME/network/admin/listener.ora from:
    ...
    SID_LIST_LISTENER =
      (SID_LIST =
       (SID_DESC =
        (SID_NAME = PLSExtProc)
        (ORACLE_HOME = /mnt/oracle/home)
        (PROGRAM = extproc)
       )
      )
    ...
    
    to:
    SID_LIST_LISTENER =
      (SID_LIST =
       (SID_DESC =
        (GLOBAL_DBNAME = svc0.foo.test.com)
        (ORACLE_HOME = /mnt/oracle/home)
        (SID_NAME = orcl)
       )
       (SID_DESC =
        (SID_NAME = PLSExtProc)
        (ORACLE_HOME = /mnt/oracle/home)
        (PROGRAM = extproc)
       )
      )
    
    Failure to do this meant I could not use the Enterprise Manager to check the status of the database.
  7. Create a cluster service the resource agent. It should look something like the following example. You should use a text editor to do this for now, as there is no GUI support:
    	<service domain="redpref" name="oracle10g">
    		<fs device="/dev/sdb7" force_unmount="1"
    		    fstype="ext3" mountpoint="/mnt/oracle"
    		    name="Oracle Mount"/>
    		<oracledb name="orcl" user="oracle" home="/mnt/oracle/home"
    		    type="10g" vhost="svc0.foo.test.com"/>
    		<ip address="192.168.1.20" />
    	</service>
      

    If you prefer the script interface (so that you can add the Oracle script with the GUI), you need to customize ORACLE_HOME, ORACLE_USER, ORACLE_SID, ORACLE_LOCKFILE, and ORACLE_TYPE to match your environment. If you do it this way, the service should look like this:
    	<service domain="redpref" name="oracle10g">
    		<fs device="/dev/sdb7" force_unmount="1"
    		    fstype="ext3" mountpoint="/mnt/oracle"
    		    name="Oracle Mount"/>
    		<script name="oracle10g" path="/path/to/oracledb.sh"/>
    		<ip address="192.168.1.20" />
    	</service>
      
    (with the <oracledb> line changed to a <script> line if you used the script method...)
  8. Run a test-stop the service using rg_test (RHCS4U2 and later; Never run this command when the cluster is running!):
    
    	[root@cyan ~]# rg_test test /etc/cluster/cluster.conf stop \
    				    service oracle10g
    	Running in test mode.
    	Stopping oracle10g...
    	Restarting /usr/share/cluster/oracledb.sh as oracle.
    	Stopping Oracle EM DB Console:                             [  OK  ]
    	Stopping iSQL*Plus:                                        [  OK  ]
    	Stopping Oracle Database:                                  [  OK  ]
    	Stopping Oracle Listener:                                  [  OK  ]
    	Waiting for all Oracle processes to exit:                  [  OK  ]
    	<info>   Removing IPv4 address 192.168.1.20/22 from eth0
    	<info>   unmounting /mnt/oracle
    	Stop of oracle10g complete
       
  9. Start the service using rg_test (Never run this command when the cluster is running!):
    
    	[root@cyan home]# rg_test test /etc/cluster/cluster.conf \
    				       start service oracle10g
    	Running in test mode.
    	Starting oracle10g...
    	<info>   mounting /dev/sdb7 on /mnt/oracle
    	<debug>  mount -t ext3  /dev/sdb7 /mnt/oracle
    	<debug>  Link for eth0: Detected
    	<info>   Adding IPv4 address 192.168.1.20/22 to eth0
    	<debug>  Sending gratuitous ARP: 192.168.1.20 00:02:55:54:28:6c \
    					 brd ff:ff:ff:ff...
    	Restarting /usr/share/cluster/oracledb.sh as oracle.
    	Starting Oracle Database:                                  [  OK  ]
    	Starting Oracle Listener:                                  [  OK  ]
    	Starting iSQL*Plus:                                        [  OK  ]
    	Starting Oracle EM DB Console:                             [  OK  ]
    	Start of oracle10g complete
       
  10. Repeat step 5 for sanity checking / testing. If you can not log in to the EM Database Console, file a Bugzilla.
  11. Repeat step 7 to stop the Oracle database.

Part 3: Finishing up on the other cluster node(s)

Perform the following steps on all nodes in the cluster:
  1. Mount the target Oracle partition(s). I used only /dev/sdb7, and I chose /mnt/oracle as the target for Oracle. During installation, Oracle asked you to run a script which set up symbolic links and/or copy files. We must Run this script on each node as the root user:
        # mount -t ext3 /dev/sdb7 /mnt/oracle
        # /mnt/oracle/home/root.sh
        # umount /mnt/oracle
      
  2. Copy /etc/oratab and /etc/oraInst.loc from the install node on which to /etc using scp or another utility.
  3. Since the cluster daemons are still not running, copy /etc/cluster/cluster.conf from the install node in to /etc/cluster using scp.
  4. At your option, you may wish to perform basic sanity checks on the Oracle installation. See Part 2, steps 8-10; the procedure is the same. DO NOT START THE ORACLE SERVICE ON MORE THAN ONE NODE.

Part 4: Firing up the cluster and enabling the Oracle service

Refer to the Red Hat Enterprise Linux documentation.

Hacks in oracledb.sh